close

Health & Fitness

BeautyHealth & Fitness

How to Care for 4C Hair? The Guide to Healthy, Beautiful Coils

How To Care For 4c Hair The Guide To Healthy Beautiful Coils

Caring for 4C hair involves understanding its unique characteristics, such as tight, dense coils prone to dryness and breakage. This guide offers essential tips for maintaining healthy 4C hair by focusing on moisture retention, protective styling, and suitable products. Follow these expert recommendations to develop a routine that nurtures your coils from root to tip.

4C Hair and Its Unique Characteristics

4C hair is a unique and beautiful hair type that falls under the category of coily hair textures. Characterized by its tight, zig-zag pattern, 4C hair is often the most delicate and prone to dryness among all hair types. Understanding the specific needs of 4C hair is essential for maintaining its health and vibrancy.

One of the key characteristics of 4C hair is its density and shrinkage. This type can shrink up to 75% of its actual length, making it appear shorter than it truly is. Additionally, 4C hair tends to be more fragile due to fewer cuticle layers protecting each strand.

When it comes to how to care for 4C hair, moisture retention is crucial. Regular deep conditioning treatments help maintain hydration levels and reduce breakage. Using sulfate-free shampoos will also prevent stripping away natural oils that are vital for keeping 4C hair moisturized.

Protective styling, such as braids or twists, can minimize manipulation and protect the ends from damage. Incorporating oils like jojoba or castor oil into your routine can seal in moisture and add an extra layer of protection against environmental stressors.

By understanding what makes 4C hair unique and adopting a tailored care regimen, you can ensure that your coily texture remains healthy, strong, and beautifully defined.

Hydrating Your 4C Hair

Hydrating your 4C hair is crucial for maintaining its health and vitality. Due to the unique structure of 4C hair, which is tightly coiled and prone to dryness, moisture retention becomes a primary concern. Proper hydration not only enhances the appearance of your natural hair but also prevents breakage and promotes growth.

One of the key strategies for moisturizing 4C hair involves using products specifically designed for coily textures. Look for ingredients like shea butter, coconut oil, and glycerin in your hair care products as they are known for their excellent moisturizing properties. These ingredients help seal in moisture, providing long-lasting hydration.

In addition to choosing the right products, it’s essential to adopt a consistent hair care routine that focuses on moisture retention. Deep conditioning treatments should be incorporated regularly to replenish lost moisture and strengthen your strands. Protective styles can also be beneficial as they minimize manipulation and reduce exposure to environmental stressors that can strip away moisture.

When selecting the best moisturizers for natural hair, consider leave-in conditioners and hydrating creams that offer intense hydration without weighing down your curls. Incorporating a water-based moisturizer followed by an oil or butter can create an effective moisture-sealing barrier.

Remember, hydrating coily hair is not just about applying products but also about understanding your hair’s needs and adjusting your routine accordingly. By prioritizing moisture retention for 4C hair, you pave the way for healthier, more resilient curls that shine with natural beauty.

Protective Styling Tips for Maintaining Healthy 4C Hair

Maintaining healthy 4C hair can be a rewarding journey, especially when incorporating protective styles into your hair care routine. Protective styles for 4C hair are essential in reducing breakage and promoting growth by minimizing the manipulation of your delicate strands. Here are some effective tips and ideas to help you keep your coily hair in optimal condition.

First, consider low manipulation hairstyles such as twists, braids, or buns. These styles require minimal daily handling, which helps in reducing stress on your hair and scalp. Twists and braids can be worn for several weeks with proper maintenance, allowing your hair to rest and grow without constant interference.

Next, explore various protective hairstyles ideas like box braids, cornrows, or faux locs. These styles not only shield your ends from environmental damage but also give you the versatility to switch up your look without compromising the health of your hair. Ensure that these styles are not too tight to avoid tension on the scalp which can lead to traction alopecia.

Additionally, always prep your hair before installing any protective style. This includes deep conditioning treatments to fortify your strands and using a leave-in conditioner for added moisture. Moisturizing is key in maintaining elasticity and preventing dryness that often leads to breakage in coily hair.

Lastly, don’t forget regular maintenance while wearing protective styles. Keep your scalp clean by washing it gently with diluted shampoo or using a dry shampoo alternative if needed. Moisturize regularly with light oils or water-based sprays to keep both scalp and strands hydrated.

By following these tips on protective styling for 4C hair, you can enjoy healthier tresses that thrive under low manipulation care while showcasing beautiful and versatile looks.

The Best Products to Use on Your 4C Hair

The Best Products To Use On Your 4c Hair

When it comes to caring for 4C hair, selecting the right products is crucial for maintaining moisture, defining curls, and promoting overall hair health. Here are some of the best products specifically formulated to meet the unique needs of coily hair.

Shampoos and Conditioners for Coily Hair

Finding a gentle shampoo that cleanses without stripping natural oils is essential. Look for sulfate-free shampoos enriched with natural ingredients like shea butter or coconut oil. These ingredients help retain moisture while cleansing the scalp. Pair your shampoo with a hydrating conditioner designed to detangle and soften coily strands.

Leave-In Conditioners for Natural Curls

Leave-in conditioners are a must-have in any 4C hair regimen. They provide ongoing hydration and help define curls throughout the day. Opt for leave-in conditioners that contain glycerin or aloe vera, which are known for their moisturizing properties. These products will keep your curls bouncy and manageable.

Deep Conditioning Treatments

Deep conditioning treatments offer intensive moisture that penetrates deep into the hair shaft, making them perfect for restoring dry or damaged 4C hair. Use treatments rich in proteins and natural oils like argan or jojoba oil once a week to strengthen and nourish your coils from within.

By incorporating these targeted products into your routine, you can ensure that your 4C hair remains healthy, hydrated, and beautifully defined.

How to Wash and Detangle Your 4C Hair

Taking care of 4C hair requires a thoughtful and consistent routine to ensure it remains healthy, moisturized, and tangle-free. Here is a step-by-step guide to help you navigate your wash day with ease.

Step 1. Pre-wash Preparation

Before diving into the washing routine for coily hair, it’s crucial to prepare your hair. Start by sectioning your dry hair into manageable parts. Apply a generous amount of pre-poo treatment or natural oil (like coconut or olive oil) to each section. This step helps in softening the hair and makes the detangling process easier.

Step 2. Detangling

Detangling techniques for natural curls are essential to prevent breakage and tangles during washing. Using your fingers or a wide-tooth comb, gently work through each section from the ends towards the roots. Be patient and avoid rushing this process to minimize damage.

Step 3. Cleansing

Once detangled, it’s time for cleansing. Use a sulfate-free shampoo specifically designed for curly hair types. Apply the shampoo directly onto your scalp and massage it in circular motions to lift dirt and buildup without stripping away natural oils. Rinse thoroughly while allowing the shampoo to run down the length of your strands.

Step 4. Conditioning

Conditioning is vital for maintaining moisture in 4C hair. Apply a rich conditioner generously from root to tip, focusing on areas that tend to be drier or more prone to tangles. Leave it on for at least five minutes before rinsing out with cool water, which helps seal the cuticle and lock in moisture.

Step 5. Deep Conditioning

For an extra boost of hydration, incorporate deep conditioning into your routine once every two weeks or as needed. Use a deep conditioner formulated for coily textures and leave it on under a shower cap for about 30 minutes before rinsing out thoroughly.

Step 6. Final Detangle

After rinsing out all conditioners, you can perform one final detangle session while your hair is still wet but not dripping wet; this will prevent tangles from forming as you proceed with styling.

By following this step-by-step guide on wash day tailored explicitly towards preventing tangles in curly hair like yours, you’ll find managing those beautiful coils significantly easier over time!

Nourishing Your Scalp

Maintaining a healthy scalp is crucial, especially for those with natural curls, as it directly impacts hair growth and vitality. Incorporating essential oils into your scalp care routine can provide numerous benefits. Oils such as tea tree, peppermint, and lavender are known for their antimicrobial properties, which help in maintaining a clean scalp environment. Additionally, these oils can soothe irritation and reduce dandruff.

One effective method to enhance the benefits of essential oils is through regular scalp massages. Scalp massage techniques not only improve blood circulation but also ensure that the nutrients from the oils are well absorbed. To perform a scalp massage, use your fingertips to apply gentle pressure in circular motions across your entire scalp. This practice can be both relaxing and beneficial in stimulating hair follicles.

For those dealing with dry scalp issues, particularly common among curly-haired individuals, it’s important to focus on hydration and moisture retention. Treating dry scalp in curly-haired individuals often involves using deep conditioning treatments that contain hydrating ingredients like aloe vera or glycerin. Combining these treatments with essential oil applications can significantly improve overall scalp health.

Incorporating these scalp care tips for natural curls into your routine will not only nourish your roots but also promote healthier, more resilient hair growth over time.

Embrace the Journey of Caring For Your Beautiful Coils

Caring for your natural coils is more than just a routine; it’s an enriching journey that celebrates the unique beauty and texture of your hair. Understanding the specific needs of curly hair types is essential to maintaining their health and vitality. From selecting the right moisturizing products to mastering protective styling techniques, each step plays a crucial role in nurturing your curls.

Regular deep conditioning treatments help maintain moisture levels, while gentle detangling practices prevent breakage and promote growth. Embracing natural oils can enhance shine and manageability, making your coils look their best every day. Additionally, incorporating a balanced diet rich in vitamins and minerals supports overall hair health from within.

Remember, patience is key when it comes to caring for curly hair. Each coil has its own personality, requiring time and attention to understand what works best. Celebrate small victories along the way, whether it’s finding a new favorite product or achieving definition on wash day.

In conclusion, embrace this journey with confidence and joy. Your beautiful coils are a testament to your individuality and resilience. With consistent care and love, they will continue to thrive, reflecting not only outer beauty but also inner strength.

read more
BeautyHealth & Fitness

Auburn Hair Ideas for Every Style and Personality

Auburn Hair Ideas For Every Style And Personality

Auburn hair is versatile and stunning, complementing various styles and personalities. Whether making a bold statement or adding warmth, there’s an auburn shade for you. From deep mahogany to bright copper, these shades suit different skin tones and preferences. This guide covers top auburn hair ideas, selecting the right shade for your complexion, mastering coloring techniques like balayage and ombré, and tips for maintaining vibrant auburn locks.

Top Auburn Shades to Consider for Your Next Look

Top Auburn Shades To Consider For Your Next Look

When it comes to transforming your look with a touch of warmth and sophistication, auburn shades are an excellent choice. Here are some top auburn shades to consider for your next look:

Dark Auburn

If you’re aiming for a rich, deep hue that exudes elegance, dark auburn is the way to go. This shade combines the depth of brown with subtle red undertones, creating a luxurious color that complements various skin tones.

Light Auburn

For those who prefer a softer and more natural appearance, light auburn offers a beautiful blend of red and blonde tones. This shade is perfect for adding warmth and brightness to your hair without being too bold.

Copper Auburn

Copper auburn is ideal if you want a vibrant and eye-catching look. This shade features strong orange-red hues that can make your hair stand out in any crowd. It’s particularly flattering on individuals with warm skin tones.

Natural Auburn

Natural auburn provides a balanced mix of brown and red tones for those seeking an understated yet striking color. This versatile shade works well with most complexions and offers a timeless appeal.

Vibrant Auburn Shades

For the adventurous at heart, vibrant auburn shades deliver intense red hues that demand attention. These bold colors are perfect for making a statement and showcasing your personality through your hair.

Whether you choose dark auburn or opt for more daring vibrant shades, each variation offers its unique charm, allowing you to find the perfect match for your style goals.

Auburn Hair Ideas for Different Skin Tones

Choosing the right shade of auburn hair can beautifully complement your skin tone, enhancing your natural features and giving you a radiant look. Here are some auburn hair ideas tailored to different skin tones:

Auburn for Fair Skin

For those with fair skin, lighter shades of auburn work wonders. Think strawberry blonde or light copper hues. These shades add warmth without overwhelming your complexion. The subtle red tones in these colors can bring out the natural blush in fair skin, creating a harmonious and vibrant appearance.

Best Auburn Shades for Medium Skin Tones

Medium skin tones have the versatility to pull off a wide range of auburn shades. Rich, golden auburns and deep coppers are particularly flattering. These shades provide a beautiful contrast against medium skin, highlighting its undertones and adding depth to your overall look. Experimenting with balayage or ombre techniques can further enhance this effect.

Dark Skin and Auburn Hair

For dark-skinned individuals, opting for darker variations of auburn can be incredibly striking. Deep mahogany or burgundy-infused auburns offer a stunning contrast that highlights the richness of dark skin tones. These deeper hues add dimension and vibrancy without clashing with your natural complexion.

Matching Hair Color with Skin Tone

It’s essential to consider your undertones when matching hair color with skin tone. Cool undertones pair well with cooler shades of auburn that have blue or violet bases, while warm undertones are complemented by warmer reds and oranges in the auburn spectrum. Consulting a professional colorist can help you find the perfect match that enhances both your hair’s beauty and your unique features.

By carefully selecting an auburn shade that aligns with your specific skin tone, you can achieve a look that’s both stunning and naturally cohesive.

Auburn Hair Color Techniques (Balayage, Ombré & Highlights)

Transforming your hair into a stunning auburn shade can be an exciting journey, especially when exploring various coloring techniques like balayage, ombré, and highlights. Each method offers unique ways to enhance the red-brown hues of auburn hair, providing dimension and depth.

Auburn balayage ideas are perfect for those seeking a natural-looking gradient. This hand-painted technique seamlessly blends lighter shades into your natural color, creating a sun-kissed effect. The key to successful auburn balayage lies in the subtle transition from darker roots to lighter ends, ensuring that the red-brown tones flow harmoniously.

Ombré auburn styles take a bolder approach by featuring a more distinct contrast between the roots and ends. Typically starting with darker roots that gradually lighten towards the tips, ombré can make a striking statement while still maintaining an elegant look. This technique is ideal for those who want to experiment with more dramatic color changes without frequent touch-ups.

For those who prefer adding just a touch of brightness, highlights in auburn hair can do wonders. Strategically placed highlights can accentuate facial features and add vibrancy to your overall look. Whether opting for subtle caramel streaks or bold copper accents, highlights offer versatility and customization.

Blending techniques for red-brown shades are crucial in achieving these looks flawlessly. Proper blending ensures that there are no harsh lines or abrupt color changes, allowing each hue to complement one another seamlessly. Professional stylists often use specialized tools and methods to achieve this smooth transition.

Whether you choose balayage for its natural appeal, ombré for its dramatic flair, or highlights for their versatility, each technique offers unique ways to enhance your auburn hair’s beauty. By understanding these methods and consulting with skilled professionals, you can achieve stunning results tailored specifically to your style preferences.

Hair Care Tips and Tricks for Caring for Your Auburn Hair

Maintaining colored hair, especially vibrant shades like auburn, requires a dedicated care routine to keep your tresses looking their best. Here are some essential tips and tricks to help you preserve the brilliance of your auburn locks.

First and foremost, invest in high-quality hair care products specifically designed for colored hair. Shampoos and conditioners formulated for dyed hair are gentler and contain ingredients that help lock in color. Look for sulfate-free options as they prevent stripping away the hue.

Another crucial step is to minimize washing frequency. Washing your hair too often can fade the color faster. Aim to wash your auburn locks two to three times a week, using lukewarm water instead of hot water which can open up the cuticle layer and cause color loss.

In addition to regular washing, incorporating a deep conditioning treatment into your routine will keep your hair hydrated and vibrant. Use a color-protecting mask or conditioner once a week to nourish your strands deeply.

Protecting your hair from heat is also vital when maintaining colored locks. Always apply a heat protectant spray before using styling tools like blow dryers, curling irons, or straighteners. Excessive heat can damage the cuticle layer and dull the vibrancy of your auburn shade.

Lastly, consider limiting sun exposure as UV rays can fade colored hair over time. Wearing hats or using leave-in conditioners with UV protection can shield your locks from harmful rays.

By following these care tips for dyed hair and using the best products for colored hair care, you’ll be able to keep your auburn vibrant longer while ensuring that your tresses remain healthy and stunningly beautiful.

read more
ExerciseHealth & Fitness

Aerial Yoga (What It Is, Its Benefits, and How to Get Started)

Aerial Yoga What It Is Its Benefits And How To Get Started

Aerial yoga combines yoga, Pilates, and dance using a suspended hammock. It aids in challenging poses and deeper stretches, improving flexibility, strength, balance, relaxation, and mindfulness. This guide covers equipment choices, clears misconceptions, teaches basic poses, and integrates aerial yoga into your fitness routine.

What Is Aerial Yoga?

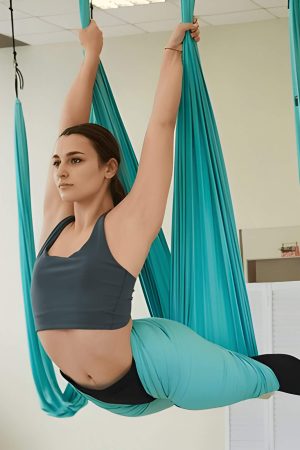
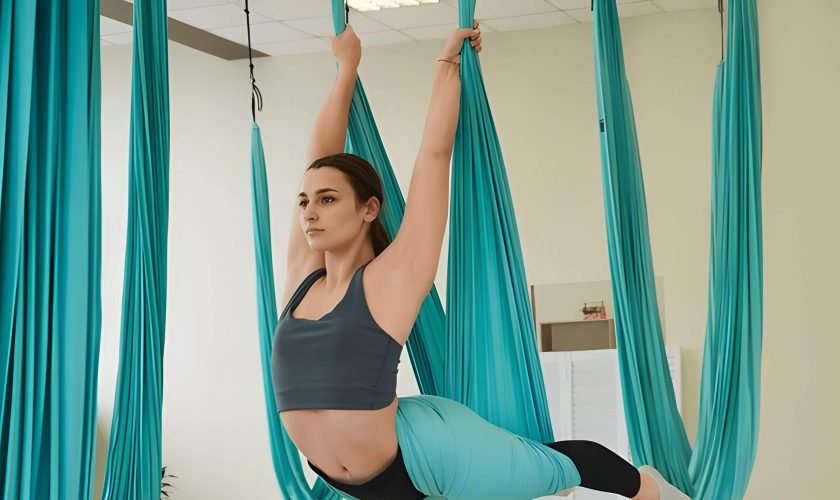
Aerial yoga, also known as anti-gravity yoga, is a unique form of exercise that combines traditional yoga poses, pilates, and dance with the use of a suspended hammock. This innovative practice allows participants to perform various poses while being supported by a soft fabric sling hanging from the ceiling.

The aerial yoga definition encompasses more than just physical fitness; it also aims to improve mental well-being and flexibility. By practicing aerial yoga, individuals can experience deeper stretches and inversions without putting too much strain on their joints and spine. This is particularly beneficial for those who may find traditional mat-based exercises challenging.

An introduction to aerial yoga typically involves learning how to safely use the hammock for support while transitioning between different poses. Beginners are often guided through basic movements that help build strength and confidence in using the apparatus. As practitioners become more comfortable, they can explore more advanced techniques that involve flips, spins, and complex stretches.

Understanding what is aerial yoga can open up new possibilities for enhancing your fitness routine. Whether you’re seeking improved flexibility, better posture, or simply a fun way to exercise, aerial yoga offers an exciting alternative that caters to various fitness levels and interests.

The Unique Benefits of Aerial Yoga for Your Body and Mind

The Unique Benefits Of Aerial Yoga For Your Body And Mind

Aerial yoga, an innovative form of exercise that combines traditional yoga poses with the use of a hammock or silk apparatus, offers a unique blend of physical and mental benefits. One of the primary aerial yoga benefits is its ability to enhance flexibility and strength. By performing poses while suspended in the air, practitioners can achieve deeper stretches and engage muscles that are often neglected in ground-based exercises.

The health benefits of aerial yoga extend beyond just physical improvements. This practice is particularly effective in decompressing the spine, which can alleviate back pain and improve overall posture. The anti-gravity nature of aerial yoga allows for a low-impact workout that reduces stress on joints while still providing a full-body workout.

In addition to physical advantages, there are significant mental benefits of aerial yoga. The practice encourages mindfulness and focus as it requires concentration to maintain balance and execute movements correctly. This heightened state of awareness can lead to reduced stress levels and improved mental clarity.

Furthermore, the sense of accomplishment from mastering challenging poses can boost self-confidence and foster a positive mindset. Overall, the combination of physical exertion and mindful practice makes aerial yoga an excellent choice for those looking to improve both their body and mind simultaneously.

Getting Started with Aerial Yoga (Essential Tips and Equipment)

Embarking on your aerial yoga journey can be both exciting and a bit daunting. This unique form of exercise combines traditional yoga poses, Pilates, and dance with the use of a hammock or silk fabric suspended from the ceiling. To help you get started with aerial yoga, we’ve compiled some essential tips and necessary equipment to ensure a smooth beginning.

Beginner Tips for Aerial Yoga

1. Find a Qualified Instructor: Before diving into aerial yoga, it’s crucial to find an experienced instructor who can guide you safely through the poses. Look for certified professionals who have a background in both yoga and aerial techniques.

2. Start Slow: As with any new fitness routine, it’s important to start slow and gradually build your strength and flexibility. Begin with beginner-level classes that focus on foundational moves before progressing to more advanced sequences.

3. Listen to Your Body: Pay close attention to how your body feels during each session. Aerial yoga involves hanging upside down and other unfamiliar positions that may take time for your body to adjust to. If something doesn’t feel right, don’t hesitate to modify the pose or take a break.

4. Dress Comfortably: Wear fitted clothing that allows for full range of motion but isn’t so loose that it gets tangled in the hammock. Avoid wearing jewelry or anything that could snag on the fabric.

Necessary Equipment for Aerial Yoga

1. Aerial Hammock/Silk Fabric: The main piece of equipment you’ll need is an aerial hammock made from strong, high-quality silk fabric designed specifically for aerial practices. Ensure it is securely installed by professionals if setting up at home.

2. Supportive Mat: While much of aerial yoga takes place off the ground, having a supportive mat underneath can provide comfort during floor exercises and serve as cushioning in case of falls.

3. Carabiners & Rigging Hardware: High-quality carabiners and rigging hardware are essential for safely securing your hammock to its anchor points on the ceiling or frame structure.

4. Ceiling Mounts/Frames: If practicing at home, you’ll need sturdy ceiling mounts or freestanding frames specifically designed to bear weight safely during inversions and other movements.

By following these beginner tips for aerial yoga and ensuring you have all necessary equipment ready, you’ll be well-prepared to dive into this invigorating practice confidently!

Common Misconceptions About Aerial Yoga Debunked

Aerial yoga has gained popularity in recent years, but with its rise, several misconceptions have also emerged. Let’s debunk some common aerial yoga myths and uncover the truth about this unique practice.

Myth 1. Aerial Yoga is Only for the Extremely Fit

One of the most pervasive misconceptions about aerial yoga is that it’s only suitable for those who are already extremely fit or flexible. In reality, aerial yoga can be adapted to suit various fitness levels. The use of a hammock provides support and allows practitioners to perform poses with greater ease, making it accessible even for beginners.

Myth 2. It’s Dangerous

Another common myth is that aerial yoga is inherently dangerous due to the use of suspended hammocks. While any physical activity carries some risk, aerial yoga is generally safe when practiced under proper guidance. Certified instructors ensure that hammocks are securely anchored and teach participants how to use them safely.

Myth 3. It’s Just a Trendy Fad

Some believe that aerial yoga is merely a passing trend with no real benefits. However, this practice combines traditional yoga poses with elements of acrobatics and Pilates, offering a comprehensive workout that improves strength, flexibility, and balance. Its holistic approach contributes significantly to both physical and mental well-being.

Myth 4. You Need Special Equipment at Home

Many people think they need to invest in expensive equipment to try aerial yoga at home. While having your own hammock can be beneficial for home practice, many studios provide all necessary equipment during classes. This allows newcomers to experience the benefits without an initial investment.

By debunking these misconceptions about aerial yoga, we hope more people will feel encouraged to explore this enriching practice without hesitation or fear.

A Beginner’s Guide to Basic Aerial Yoga Poses and Techniques

Aerial yoga, a unique blend of traditional yoga and aerial arts, offers a refreshing way to enhance your flexibility, strength, and mindfulness. For beginners eager to explore this practice, starting with basic aerial yoga poses and techniques is essential. Here are some easy poses in aerial yoga that will help you get started on the right foot.

1. The Aerial Mountain Pose: This foundational pose helps you get accustomed to using the hammock. Stand with your feet hip-width apart, holding onto the fabric at waist height. Engage your core and maintain an upright posture as you breathe deeply.

2. Supported Chair Pose: Begin by sitting in the hammock like a swing with both feet flat on the ground. Lean back slightly while gripping the fabric for support. This pose strengthens your legs and improves balance without putting strain on your joints.

3. Star Inversion: An excellent introduction to inversions, this pose allows you to experience being upside down safely. With the hammock supporting your hips, let yourself hang freely while extending your arms and legs outward like a starfish.

4. Floating Savasana: End your practice with this relaxing technique by lying fully extended in the hammock like you’re in a cocoon. This pose promotes deep relaxation and helps release tension from both body and mind.

By incorporating these basic aerial yoga techniques into your routine, you’ll build confidence and develop a solid foundation for more advanced poses as you progress in your practice of aerial yoga poses for beginners.

How to Incorporate Aerial Yoga into Your Regular Fitness Routine

Incorporating aerial yoga into your regular fitness routine can bring a fresh and dynamic dimension to your workouts. Combining fitness routines with aerial yoga not only enhances flexibility and strength but also provides a unique way to engage different muscle groups. Here’s how you can effectively integrate aerial fitness into your workouts:

1. Start with the Basics: If you’re new to aerial yoga, begin by familiarizing yourself with the fundamental poses and techniques. Many studios offer beginner classes that focus on building foundational skills.

2. Schedule Regular Sessions: Consistency is key when integrating any new activity into your fitness routine. Aim for at least one or two aerial yoga sessions per week to allow your body to adapt and improve.

3. Combine Strength Training: Aerial yoga can complement traditional strength training exercises. Use it as a warm-up or cool-down session to stretch out muscles worked during weightlifting or resistance training.

4. Focus on Core Engagement: Aerial yoga requires significant core stability, making it an excellent addition for enhancing core strength. Incorporate poses that challenge your balance and engage your abdominal muscles.

5. Customize Your Routine: Tailor your aerial yoga practice to fit your personal fitness goals. Whether you’re looking to increase flexibility, build strength, or improve balance, there are specific poses and sequences that can help you achieve these objectives.

6. Listen to Your Body: As with any new exercise regimen, it’s important to listen to your body and avoid pushing yourself too hard too soon. Gradually increase the intensity of your sessions as you become more comfortable with the movements.

By integrating aerial fitness into workouts, you’ll not only diversify your exercise routine but also enjoy the numerous physical benefits it offers. With dedication and practice, aerial yoga can become a rewarding component of a well-rounded fitness plan.

Conclusion- Embrace the Transformation with Aerial Yoga Today!

Aerial yoga offers a unique and transformative experience that combines traditional yoga poses, Pilates, and dance with the support of a hammock. This innovative form of exercise not only enhances flexibility and strength but also provides a sense of weightlessness that can alleviate stress and improve mental clarity.

The benefits of aerial yoga are extensive. Physically, it helps in decompressing the spine, improving joint mobility, and increasing overall body strength. Mentally, the practice encourages mindfulness and relaxation by allowing practitioners to focus on their movements and breath in a new dimension.

Whether you’re a seasoned yogi or new to the practice, aerial yoga presents an opportunity to challenge yourself in new ways while reaping numerous health benefits. It’s an excellent way to diversify your fitness routine, build confidence, and enjoy the exhilarating sensation of floating.

Embrace this transformative journey today by incorporating aerial yoga into your wellness regimen. The unique combination of physical exertion and mental tranquility promises not just a workout but an uplifting experience that can enhance your overall well-being.

read more