close

September 2024

CoffeeFood & Beverage

How to Brew the Perfect Americano Coffee at Home

How To Brew The Perfect Americano Coffee At Home

Brewing the perfect Americano at home is simple. Combining robust espresso with hot water creates a rich, mild beverage. This guide covers essential ingredients, equipment, brewing steps, and troubleshooting tips to elevate your Americano coffee.

What is an Americano Coffee?

An Americano coffee, also known as an espresso Americano, is a popular coffee type that offers a unique and distinct flavor profile. The drink is made by diluting a shot of espresso with hot water, resulting in a beverage that has the strength and robust flavors of an espresso but with a smoother, less intense taste.

The origins of the Americano coffee are often traced back to World War II when American soldiers stationed in Europe found traditional Italian espresso too strong for their palates. To make it more palatable, they added hot water to the espresso, creating what we now know as an Americano.

One of the key characteristics that sets an Americano apart from other coffee types is its versatility. The ratio of espresso to water can be adjusted according to personal preference, allowing for variations in strength and flavor. This makes it an ideal choice for those who enjoy the rich taste of espresso but prefer a less concentrated beverage.

The Essential Ingredients and Equipment for Making an Americano

Making a perfect Americano requires not only the right technique but also the essential ingredients and equipment. Understanding these components can elevate your coffee-making experience and ensure you enjoy a rich, flavorful cup every time.

First and foremost, selecting the best coffee beans for an Americano is crucial. Opt for high-quality, freshly roasted beans that boast a balanced profile. Medium to dark roasts are often preferred as they provide a robust flavor that stands up well when diluted with water.

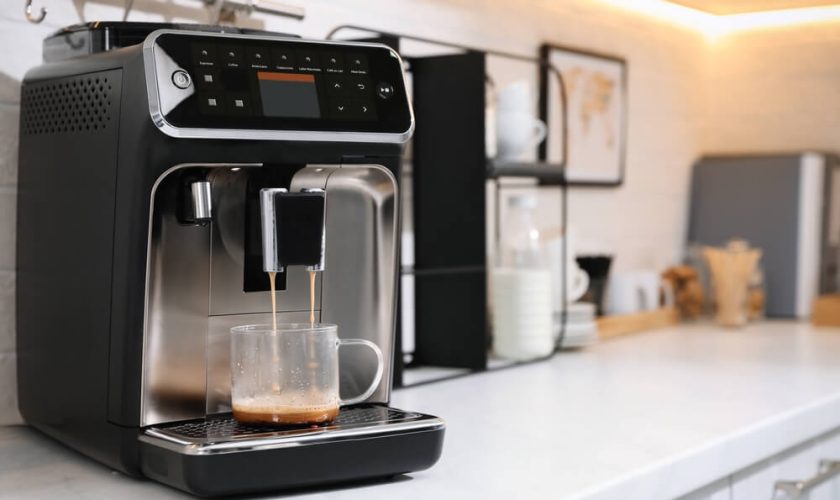
Next, an espresso machine is indispensable for making an authentic Americano. This machine allows you to extract a concentrated shot of espresso, which forms the base of your drink. Investing in a reliable espresso machine with consistent pressure and temperature control will significantly enhance your coffee quality.

Equally important is a hot water dispenser or kettle to add hot water to the espresso shot. The ideal ratio is typically one part espresso to two parts hot water, although this can be adjusted according to personal preference.

Finally, don’t overlook the importance of a good coffee grinder. Freshly ground beans are essential for achieving optimal flavor extraction. A burr grinder is recommended over blade grinders as it provides a more uniform grind size, which contributes to better-tasting espresso shots.

By combining these essential ingredients and equipment, you can master the art of making an exceptional Americano at home.

Step-by-Step Guide to Brewing the Perfect Americano at Home

Step By Step Guide To Brewing The Perfect Americano At Home

Brewing the perfect Americano at home is a rewarding experience that combines precision and simplicity. Here’s a step-by-step guide to help you master this classic coffee drink.

Step 1. Preparing the Espresso

The foundation of a great Americano lies in pulling the perfect espresso shot. Begin by grinding fresh coffee beans to a fine consistency, suitable for espresso. Use approximately 18-20 grams of coffee for a double shot. Tamp the grounds evenly in your portafilter and lock it into your espresso machine.

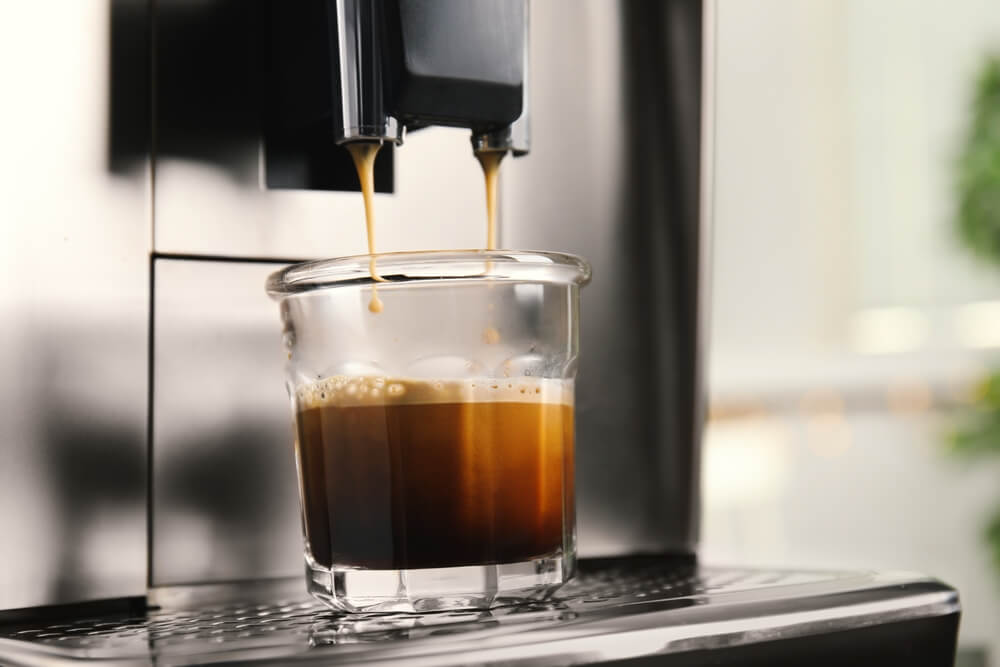
Step 2. Pulling the Espresso Shot

Start your espresso machine and pull a double shot, aiming for an extraction time of around 25-30 seconds. This ensures that you capture the rich flavors and aromatic oils essential for a quality espresso base.

Step 3. Adding Hot Water

Once you have your perfect espresso shot, it’s time to transform it into an Americano by adding hot water. The standard ratio is one part espresso to two parts hot water, but this can be adjusted based on personal preference. Boil fresh water and let it cool slightly before pouring; this prevents scorching the delicate flavors of the espresso.

Step 4. Combining Espresso and Water

Pour the hot water into your cup first, followed by slowly adding the freshly brewed espresso on top. This method helps preserve the crema—the golden layer of foam that sits on top of an excellent shot—resulting in a visually appealing Americano with balanced flavor.

By following these simple steps, you’ll be able to enjoy a perfectly brewed Americano right from your home kitchen, capturing all its robust yet smooth characteristics every time you make one.

Troubleshooting Common Issues in Brewing Americano Coffee

Brewing the perfect Americano can sometimes feel like a delicate balancing act. From bitterness to weakness, several factors can affect your final cup. Here are some troubleshooting tips to help you address common issues:

1. Bitter Coffee Fix: If your Americano tastes overly bitter, it could be due to over-extraction. This often happens when the espresso shot is pulled for too long or the grind size is too fine. Try adjusting your grind coarser and ensure you’re pulling shots within the recommended time frame (usually 25-30 seconds).

2. Weak Americano Solutions: A weak Americano usually results from under-extraction or using too much water in proportion to the espresso shot. Make sure you’re using fresh, high-quality beans and an appropriate grind size for a balanced extraction. Additionally, experiment with reducing the amount of added hot water until you find a strength that suits your taste.

3. Crema Problems in Espresso: The crema is an essential component of a good espresso shot, contributing both flavor and texture to your Americano. If you’re experiencing issues with crema formation, it might be due to stale coffee beans or incorrect tamping pressure during preparation. Always use freshly roasted beans and apply consistent pressure when tamping.

By addressing these common problems with targeted solutions, you can significantly improve the quality of your Americano coffee and enjoy a more satisfying brew every time.

Expert Tips for Enhancing Your Homemade Americano Experience

For coffee enthusiasts looking to elevate their homemade Americano experience, a few expert tips can significantly enhance the flavor and enjoyment of this classic beverage. Here are some strategies for improving the taste of your Americano and adding exciting flavor enhancements to your coffee drinks.

1. Quality Beans Matter: Start with high-quality, freshly roasted coffee beans. The foundation of any great Americano is the espresso, so investing in premium beans will ensure a richer and more complex flavor profile.

2. Proper Grinding: Use a burr grinder to achieve a consistent grind size suitable for espresso. A uniform grind will help extract the optimal flavors from your beans, resulting in a smoother and more balanced Americano.

3. Water Quality: The water you use can greatly affect the taste of your coffee. Filtered water free from impurities will highlight the natural flavors of the espresso without introducing any unwanted tastes.

4. Temperature Control: For an ideal Americano, it’s crucial to maintain proper water temperature when brewing your espresso and diluting it with hot water. Aim for water around 200°F (93°C) for brewing and slightly cooler for dilution to avoid scalding or bitter notes.

5. Flavor Enhancements: Experiment with subtle additions like a dash of cinnamon, nutmeg, or cocoa powder to add depth without overpowering the natural taste of your coffee drink. For those who enjoy sweetness, consider using natural sweeteners like honey or agave syrup instead of refined sugar.

6. Serving Suggestions: Serve your Americano in pre-warmed cups to maintain its temperature longer and enhance its aroma upon serving. Pairing it with complementary snacks such as biscotti or dark chocolate can also elevate your overall experience.

By focusing on these elements, you’ll be well on your way to crafting an exceptional homemade Americano that rivals even those from your favorite café.

The Health Benefits of Drinking Americano Coffee

Drinking an Americano coffee, a popular low-calorie coffee option, offers numerous health benefits that go beyond its rich and robust flavor. One of the primary benefits of drinking black coffee, such as an Americano, is its potential to boost mental alertness and concentration. The caffeine content in an Americano can help improve cognitive function by stimulating the central nervous system, making it a great choice for those needing a mental pick-me-up.

Moreover, the health benefits of americanos extend to weight management. Since an Americano is typically made without added sugars or creams, it remains a low-calorie beverage that can fit seamlessly into most diet plans. This makes it an excellent option for individuals looking to reduce their calorie intake while still enjoying their daily cup of coffee.

Additionally, drinking black coffee has been linked to various long-term health advantages. For instance, regular consumption has been associated with a lower risk of certain diseases such as Parkinson’s and Alzheimer’s due to its high antioxidant content. These antioxidants help combat oxidative stress and inflammation in the body.

Elevate Your Morning Routine with the Perfect Homemade Americano Coffee

Incorporating a homemade Americano coffee into your morning routine can transform the start of your day. With its rich flavor and simplicity, this classic espresso-based drink offers a perfect balance of strength and smoothness. By mastering the art of making an Americano at home, you not only save time and money but also gain control over every aspect of your brew—from the quality of beans to the water temperature.

To create your perfect Americano, begin with freshly ground high-quality coffee beans. Use an espresso machine or a stovetop espresso maker to brew a robust shot of espresso. Then, dilute it with hot water to achieve your desired strength. The traditional ratio is one part espresso to two parts water, but feel free to adjust according to taste.

Experimenting with different types of beans and roast levels can further enhance your experience, allowing you to discover new flavors and aromas that suit your palate. Additionally, consider investing in a good grinder and maintaining consistent brewing practices for optimal results.

By taking these steps, you can elevate not just your morning routine but also your appreciation for coffee as an art form. So next time you’re craving that perfect cup, skip the café line and enjoy crafting a delicious homemade Americano right in the comfort of your own kitchen.

read more
BusinessSales

What Is an Estate Sale? A Guide to Liquidating Personal Property

What Is An Estate Sale A Guide To Liquidating Personal Property

Estate sales provide an efficient way to liquidate personal property due to death, downsizing, or other life changes. They involve selling various items, from household goods to valuable collectibles. This method has gained popularity recently. Understanding the process, benefits, and challenges of estate sales is important for those considering this option or interested in property liquidation.

Understanding the Basics (Definition and Purpose of Estate Sales)

Estate sales, also known as liquidation sales or personal property sales, are organized events designed to sell the majority of a person’s belongings. These sales typically occur when someone passes away, moves to a care facility, or needs to downsize significantly. The primary purpose of an estate sale is to efficiently liquidate household goods and personal property, often within a short timeframe.

Unlike garage sales or yard sales, estate sales usually involve selling the contents of an entire home, including furniture, appliances, clothing, jewelry, collectibles, and even vehicles. Professional estate sale companies often manage these events, ensuring proper valuation, organization, and marketing of items.

Estate sales serve multiple purposes:

1. Liquidation: They provide a means to quickly convert personal property into cash.

2. Clearing out a property: Estate sales help empty a house in preparation for sale or new occupancy.

3. Fair distribution: They offer a way to divide assets among heirs or beneficiaries.

4. Preservation of valuable items: Estate sale professionals can identify and properly handle valuable or antique items.

Understanding the basics of estate sales can help individuals make informed decisions when faced with the need to liquidate a large amount of personal property, whether for themselves or on behalf of a loved one.

When to Consider an Estate Sale (Common Scenarios and Situations)

When To Consider An Estate Sale Common Scenarios And Situations

Estate sales are effective solutions for liquidating personal property in various life circumstances. Here are some common scenarios where an estate sale might be the best option:

1. Downsizing: As people age or enter retirement, they often choose to move to smaller, more manageable homes. An estate sale can help declutter and sell items that won’t fit in the new space.

2. Moving: Long-distance relocations or moves abroad may necessitate selling a significant portion of one’s belongings. Estate sales offer a streamlined way to dispose of furniture, appliances, and other items that are impractical to transport.

3. Divorce: When couples separate, dividing assets can be challenging. A divorce estate sale provides a neutral way to liquidate shared property and split the proceeds.

4. Death of a family member: Following a loved one’s passing, heirs may need to sell the deceased’s possessions. An estate sale can help manage this process efficiently and respectfully.

5. Bankruptcy liquidation: In cases of financial distress, an estate sale can be used to sell personal assets to satisfy creditors and generate funds.

6. Transitioning to assisted living: When individuals move to care facilities, they often need to sell most of their household items quickly.

7. Clearing out inherited property: Beneficiaries who inherit a property full of belongings may opt for an estate sale to clear the house for sale or personal use.

Understanding these common scenarios can help individuals determine if an estate sale is the right choice for their unique situation.

The Estate Sale Process (From Planning to Execution)

The estate sale process involves several crucial steps to ensure a successful event. Planning is the foundation of any well-executed estate sale. Begin by taking inventory of all items to be sold and categorizing them accordingly. This step helps in organizing the sale efficiently and identifying valuable pieces that may require professional appraisal.

Pricing items for an estate sale requires research and careful consideration. Consult pricing guides, online marketplaces, and antique dealers to determine fair market values. Be prepared to negotiate, as many buyers expect some flexibility in pricing.

Setting up the estate sale is a time-consuming but essential task. Arrange items logically throughout the space, grouping similar objects together. Ensure all items are clean, well-presented, and easily accessible to potential buyers. Clear labeling of prices and any pertinent information about the items will streamline the selling process.

Marketing plays a vital role in attracting buyers to your estate sale. Utilize various channels such as local newspapers, online classifieds, social media platforms, and estate sale websites to promote the event. Consider hiring a professional estate sale company to handle the entire process, as they often have established networks and marketing strategies to maximize attendance and sales.

By following these steps in estate sale planning, organizing, pricing, setup, and marketing, you can create a smooth and profitable experience for both sellers and buyers alike.

DIY vs Professional Estate Sale Companies (Pros and Cons)

When faced with liquidating an estate, many individuals find themselves weighing the options between a DIY approach and hiring professional estate sale companies. Both methods have their merits and drawbacks, and understanding these can help you make an informed decision.

DIY estate sales offer the advantage of complete control over the process and potentially higher profits, as you won’t be paying fees to a professional service. However, they require significant time, effort, and organizational skills. You’ll need to handle pricing, marketing, setup, and sales management yourself, which can be overwhelming, especially during an emotionally challenging time.

On the other hand, professional estate sale services bring expertise and efficiency to the table. These liquidators have experience in accurately valuing items, staging the sale effectively, and attracting a larger pool of buyers through their established networks. They handle all aspects of the sale, from setup to cleanup, saving you time and stress. However, their services come at a cost, typically a percentage of the sale’s proceeds.

Estate sale fees for professional companies usually range from 30% to 50% of the total sales, depending on the complexity of the estate and the services provided. While this may seem high, their ability to price items correctly and maximize attendance often results in higher overall sales, potentially offsetting their fees.

The choice between DIY and professional estate sale companies depends on your personal circumstances, including available time, emotional readiness, and the complexity of the estate. Carefully consider these factors to determine which option aligns best with your needs and goals.

What to Expect During an Estate Sale (Etiquette and Best Practices)

Estate sales offer a unique opportunity to find hidden treasures and valuable items, but it’s essential to understand the proper etiquette and best practices to make the most of your experience. First and foremost, respect the estate sale hours. Arriving early is acceptable, but don’t expect to enter before the designated start time. Many sales operate on a first-come, first-served basis, so be prepared to wait in line if you arrive early.

When it comes to estate sale pricing, items are typically marked with their set prices. While some sales allow for negotiation, it’s best to wait until later in the day or towards the end of the sale to haggle. If you’re interested in negotiating at estate sales, be polite and reasonable with your offers. Remember that the organizers are professionals who have likely researched the value of items.

As you shop estate sales, be mindful of other shoppers and the property. Don’t block access to items, and handle objects with care. If you’re unsure about a price or have questions, seek out a staff member for assistance. Many sales have rules about holding or reserving items, so familiarize yourself with these policies before making purchases.

By following these estate sale etiquette guidelines, you’ll ensure a positive experience for yourself and others while potentially scoring some fantastic finds.

Legal and Financial Considerations for Estate Sales

When organizing an estate sale, it’s crucial to be aware of the legal and financial aspects involved. Estate sale taxes are a significant consideration, as the proceeds may be subject to income tax or capital gains tax depending on the nature of the items sold and their appreciation in value. It’s advisable to consult with a tax professional to understand your specific obligations.

Obtaining the necessary permits for estate sales is essential to comply with local regulations. Many municipalities require special permits or licenses for conducting sales on residential property. Failure to secure these can result in fines or the shutdown of your sale.

Estate sale insurance is another important factor to consider. This can protect you from potential liability issues that may arise during the sale, such as accidents on the property or disputes over item authenticity.

If the estate is in probate, there may be additional complications. Probate and estate sales often go hand in hand, but it’s crucial to ensure you have the legal authority to conduct the sale before proceeding. This may involve obtaining permission from the probate court or executor of the estate.

Determining the fair market value of items is critical for both tax purposes and ensuring a successful sale. Professional appraisers can help establish accurate values for high-ticket items or collections, which can be beneficial for both pricing and potential tax implications.

By addressing these legal and financial considerations, you can ensure a smooth and compliant estate sale process while maximizing the value of the estate’s assets.

Alternatives to Estate Sales (Other Options for Liquidating Assets)

When faced with the task of liquidating assets, estate sales aren’t the only option available. Several alternatives can be just as effective, depending on your specific needs and circumstances.

Online auctions have become increasingly popular, offering a wider audience and potentially higher returns. Platforms like eBay or specialized estate auction websites allow you to reach buyers across the globe, often resulting in competitive bidding for unique or valuable items.

Consignment shops present another viable option, especially for high-end furniture, jewelry, or antiques. These shops handle the sales process, taking a percentage of the final sale price, which can be ideal if you’re short on time or expertise in selling specific items.

For those looking to make a positive impact, donation options are worth considering. Many charitable organizations accept furniture, clothing, and household items, which can provide tax benefits while supporting worthy causes.

Comparing garage sales vs estate sales, the former can be a quicker, more casual approach for selling lower-value items. While estate sales typically involve professional organizers and attract serious buyers, garage sales can be organized independently and appeal to local bargain hunters.

Lastly, estate buyouts offer a convenient solution for those seeking a swift resolution. Companies specializing in this service will purchase the entire contents of a property, saving time and effort in organizing individual sales.

By exploring these alternatives, you can find the most suitable method for liquidating assets based on your unique situation, timeline, and financial goals.

Making the Most of Your Estate Sale Experience

Hosting a successful estate sale requires careful planning, organization, and attention to detail. By following the tips and strategies outlined in this guide, you can maximize your profits and ensure a smooth experience for both you and your customers. Remember to price items fairly, create an inviting atmosphere, and promote your sale effectively to attract potential buyers.

Don’t forget to enlist the help of friends, family, or professional estate sale services if needed. Their support can be invaluable in managing the various aspects of the sale, from setup to cleanup. Additionally, consider donating unsold items to charity, which can provide a tax benefit and help those in need.

An estate sale is not just about selling possessions; it’s about honoring memories and transitioning to a new chapter in life. Approach the process with patience and a positive attitude, and you’ll find that your estate sale can be a rewarding and cathartic experience.

read more
FinanceLoan

Comparing Loan From Private Money Lenders to Traditional Bank Loans – Which Option is Right for You?

Comparing Loan From Private Money Lenders To Traditional Bank Loans Which Option Is Right For You

Choosing between private money lenders and traditional bank loans is a critical decision for borrowers. Each option has distinct advantages and drawbacks in terms of approval processes, interest rates, loan flexibility, and risk factors. Understanding these differences is essential for borrowers to make informed decisions that align with their financial needs and goals.

Understanding Private Money Lenders and Traditional Bank Loans

Private money lenders and traditional bank loans represent two distinct lending options in the financial landscape. While both serve the purpose of providing funds to borrowers, they differ significantly in their approach, requirements, and terms.

Traditional bank loans are offered by established financial institutions and typically involve a rigorous approval process. These loans often feature lower interest rates and longer repayment terms, making them attractive for borrowers with strong credit histories. Banks adhere to strict regulatory guidelines, which can result in a more time-consuming application process but also provide added security for borrowers.

On the other hand, private money lenders are individuals or organizations that operate outside the traditional banking system. They often specialize in specific loan types, such as real estate or business loans. Private lenders generally offer more flexible terms and faster approval processes, making them appealing to borrowers who may not qualify for bank loans or need funding quickly. However, these advantages often come with higher interest rates and shorter repayment periods.

Understanding the differences between these lending options is crucial for borrowers to make informed decisions based on their financial situation, credit history, and funding needs. While traditional bank loans may be more suitable for long-term, lower-risk borrowing, private money lenders can provide valuable alternatives for those seeking quick capital or unconventional financing solutions.

Key Differences in Approval Process and Requirements

The loan approval process varies significantly depending on the type of loan and lender. Traditional banks often have stricter requirements and longer approval times compared to online lenders. Credit score requirements play a crucial role in loan approval, with higher scores typically leading to better terms and increased chances of approval. Collateral is another important factor, particularly for secured loans like mortgages or auto loans, where the asset being purchased serves as security for the lender.

Income verification is a standard part of most loan applications, with lenders assessing the borrower’s ability to repay the loan based on their current earnings and employment stability. The loan application itself may differ in complexity, with some lenders offering streamlined online processes while others require extensive documentation and in-person meetings.

It’s important for borrowers to understand these key differences when applying for loans, as they can significantly impact the likelihood of approval and the terms offered. Researching and comparing various lenders and their specific requirements can help applicants navigate the loan approval process more effectively and increase their chances of securing favorable loan terms.

Comparative Analysis of Interest Rates and Cost Structures

Comparative Analysis Of Interest Rates And Cost Structures

When comparing loan options, it’s crucial to look beyond the advertised interest rates and consider the overall cost of borrowing. Interest rates are undoubtedly a significant factor, but they don’t tell the whole story. Origination fees, which are charged for processing the loan, can significantly impact the total cost. These fees typically range from 0.5% to 1% of the loan amount and are often rolled into the loan balance.

Closing costs are another important consideration, especially for mortgages. These can include appraisal fees, title insurance, and various other charges that can add up to thousands of dollars. To get a more accurate picture of the loan’s true cost, borrowers should focus on the annual percentage rate (APR), which factors in both the interest rate and fees.

Loan terms also play a crucial role in determining the overall cost. While longer terms may result in lower monthly payments, they often lead to paying more interest over the life of the loan. Conversely, shorter terms typically have higher monthly payments but result in less interest paid overall.

By carefully examining interest rates, fee structures, and loan terms, borrowers can make more informed decisions and potentially save significant amounts of money over the life of your loan.

Loan Amounts and Funding Speed – Private Lenders vs Banks

When comparing private lenders to traditional banks, two crucial factors to consider are loan amounts and funding speed. Private lenders often offer greater flexibility in loan limits, catering to borrowers who require larger sums or have unique financial needs. These lenders may approve loans ranging from a few thousand dollars to several million, depending on the borrower’s creditworthiness and the purpose of the loan.

In contrast, banks typically have more rigid loan limits, which are often tied to specific loan products or regulatory constraints. This can limit a borrower’s capacity to secure larger amounts, especially for unconventional projects or investments.

Funding timeline is another area where private lenders generally outpace banks. Private lenders are known for their quick loans, often processing applications and disbursing funds within days or even hours. This rapid turnaround can be crucial for time-sensitive opportunities or urgent financial needs.

Banks, on the other hand, usually have a more extensive underwriting process, which can extend the funding timeline to weeks or months. While this thorough approach helps mitigate risk, it may not be suitable for borrowers seeking immediate access to capital.

While private lenders offer advantages in terms of borrowing capacity and speed, they may charge higher interest rates or fees compared to traditional banks. Borrowers should carefully weigh these factors against their specific needs and financial situation when choosing between private lenders and banks for their loan requirements.

Flexibility and Customization of Loan Terms

Flexibility and customization of loan terms have become increasingly important features in modern lending practices. Borrowers now have access to a variety of loan repayment options that can be tailored to their specific financial situations. Loan modification programs allow borrowers to adjust their terms if they encounter financial difficulties, potentially avoiding default. Many lenders now offer loans without prepayment penalties, giving borrowers the freedom to pay off their debts early without incurring additional costs.

Loan duration is another aspect that can be customized, with options ranging from short-term loans to extended repayment periods. This flexibility enables borrowers to choose a term that aligns with their financial goals and capabilities. Additionally, borrower-friendly terms such as grace periods, interest-only payments, or graduated repayment plans are becoming more common, providing borrowers with greater control over their loan management.

These customizable features not only benefit borrowers but also contribute to a healthier lending ecosystem by reducing the risk of defaults and fostering positive relationships between lenders and borrowers.

Risk Factors and Borrower Protections

When considering a loan, it’s crucial to understand the various risk factors and borrower protections in place. Loan security plays a significant role in safeguarding both lenders and borrowers. In the event of default, the foreclosure process may be initiated, but it’s important to note that this process is regulated by strict guidelines to protect homeowners.

Consumer protection laws serve as a safety net for borrowers, ensuring fair practices in lending. These laws aim to prevent predatory lending tactics, such as excessive fees or misleading terms. Borrowers should familiarize themselves with these laws to recognize and avoid potentially harmful loan agreements.

Loan insurance is another important consideration. It can provide an additional layer of protection for borrowers in case of unforeseen circumstances like job loss or illness. However, it’s essential to carefully review the terms and conditions of any insurance policy to understand its coverage and limitations.

By being aware of these risk factors and protections, borrowers can make more informed decisions and navigate the lending process with greater confidence and security.

Ideal Scenarios for Choosing Private Money Lenders

Private money lenders offer unique advantages in specific financial scenarios, making them an attractive option for various borrowers. Real estate investments often benefit from private lending, particularly for fix-and-flip projects or commercial property acquisitions that require quick funding. These lenders can provide the necessary capital faster than traditional banks, allowing investors to seize time-sensitive opportunities.

Business loans are another area where private money lenders excel. Entrepreneurs seeking to expand their operations or launch new ventures may find private lenders more flexible in their approval criteria and loan structures. This flexibility is especially valuable for businesses with unconventional revenue models or those in emerging industries.

Bridge loans represent a common use case for private money lending. These short-term loans bridge the gap between immediate financial needs and long-term financing solutions, proving invaluable in situations like property purchases or business acquisitions where timing is crucial.

Poor credit borrowers often turn to private money lenders when traditional financial institutions deny their loan applications. While interest rates may be higher, private lenders are more willing to consider the overall financial picture rather than focusing solely on credit scores.

Fast funding needs are perhaps one of the most compelling reasons to choose private money lenders. Whether it’s capitalizing on a sudden investment opportunity or addressing an urgent financial requirement, private lenders can often provide funds within days, compared to the weeks or months typically required by conventional lenders.

When Traditional Bank Loans May Be the Better Option

While alternative lending options have gained popularity, traditional bank loans still hold significant advantages in certain scenarios. For long-term financing needs, such as purchasing a home or funding a large business expansion, conventional bank loans often offer more favorable terms. These loans typically come with lower interest rates, especially for borrowers with an established credit history, resulting in substantial savings over the life of the loan.

Moreover, banks frequently provide government-backed loans, such as SBA loans for businesses or FHA loans for homebuyers, which can offer more lenient qualification criteria and better terms than their non-government counterparts. Conventional mortgages, in particular, remain a cornerstone of home financing, offering competitive rates and standardized terms that have stood the test of time.

For those with a strong credit profile and the patience to navigate a more rigorous application process, traditional bank loans can provide a sense of security and potentially significant cost savings. The regulated nature of banks also adds an extra layer of consumer protection, making them a reliable choice for major financial commitments.

Making an Informed Decision for Your Financial Needs

It’s crucial to remember that there’s no one-size-fits-all solution when it comes to managing your money. Each individual’s financial situation is unique, and what works for one person may not be the best choice for another.

Take the time to carefully consider your personal goals, risk tolerance, and current financial standing before making any significant decisions. It’s often beneficial to consult with a financial advisor who can provide personalized guidance based on your specific circumstances.

Remember that financial management is an ongoing process. Regularly review and adjust your strategies as your life circumstances change and as you progress towards your financial objectives. Stay informed about market trends and new financial products, but always approach them with a critical eye.

The key to financial success lies in making educated choices, maintaining discipline in your spending and saving habits, and remaining flexible enough to adapt to changing economic conditions. By taking a thoughtful, informed approach to your finances, you’ll be better equipped to secure your financial future and achieve your long-term goals.

read more
Food & Beverage

How Long Does Cooked Chicken Last in the Fridge? A Guide to Safe Storage and Consumption

How Long Does Cooked Chicken Last In The Fridge A Guide To Safe Storage And Consumption

Proper food storage is essential for maintaining health and preventing waste, especially when it comes to perishable items like cooked chicken. This guide explores the best practices for storing cooked chicken, including refrigeration techniques, signs of spoilage, and safe reheating methods. By following these guidelines, you can ensure your leftover chicken remains safe to eat and retains its quality for several days after cooking.

How Long Does Cooked Chicken Last in the Fridge

Properly storing cooked chicken is essential for maintaining its quality and ensuring food safety. When refrigerated correctly, cooked chicken can last for 3 to 4 days in the fridge. To maximize its shelf life, store the chicken in airtight containers or wrap it tightly in plastic wrap or aluminum foil. It’s crucial to refrigerate cooked chicken within two hours of preparation, or within one hour if the ambient temperature is above 90°F (32°C).

Factors Affecting the Longevity of Refrigerated Cooked Chicken

The longevity of refrigerated cooked chicken depends on several key factors. Storage temperature is crucial; maintaining a consistent temperature below 40°F (4°C) significantly slows bacterial growth. The type of container used also plays a role, with airtight containers helping to prevent moisture loss and contamination.

The cooking method can impact shelf life as well. Chicken that has been thoroughly cooked to an internal temperature of 165°F (74°C) will generally last longer than undercooked meat. Additionally, the way the chicken was prepared – whether it was seasoned, marinated, or mixed with other ingredients – can affect its longevity.

Cross-contamination risks should not be overlooked. Storing cooked chicken separately from raw meats and using clean utensils when handling can prevent the introduction of harmful bacteria. By considering these factors and following proper food safety guidelines, you can maximize the shelf life of your refrigerated cooked chicken and ensure it remains safe for consumption.

Proper Storage Techniques for Maximizing Cooked Chicken Freshness

Proper storage techniques are crucial for maintaining the freshness and safety of cooked chicken. Start by allowing the chicken to cool to room temperature, but don’t leave it out for more than two hours to prevent bacterial growth. Once cooled, divide the chicken into portion-sized amounts to facilitate easier reheating and reduce waste.

Airtight containers are essential for storing cooked chicken in the refrigerator. These containers prevent cross-contamination and keep the chicken moist. Glass or BPA-free plastic containers with tight-fitting lids are ideal choices. Alternatively, you can wrap the chicken tightly in aluminum foil or plastic wrap before placing it in a container for added protection.

Refrigerator organization plays a key role in maintaining chicken freshness. Store the containers on the middle or upper shelves, where temperatures are most consistent. Avoid placing them near the door, as frequent opening and closing can lead to temperature fluctuations.

For optimal freshness, use cooling methods that quickly bring down the chicken’s temperature. If you have large quantities, spread the chicken in a single layer on a baking sheet and refrigerate until cool before transferring to containers. This method helps prevent the center from remaining warm, which can promote bacterial growth.

How to Tell if Your Cooked Chicken Has Gone Bad

How To Tell If Your Cooked Chicken Has Gone Bad

Knowing how to identify spoiled cooked chicken is crucial for food safety. Several key indicators can help you determine if your chicken has gone bad:

Odor: Fresh cooked chicken should have a mild, pleasant aroma. If you detect any sour, rancid, or ammonia-like smells, it’s a clear sign of spoilage.

Discoloration: Cooked chicken should maintain a white or brown color, depending on the cooking method. If you notice any gray, green, or moldy spots, it’s time to discard the chicken.

Texture changes: Spoiled chicken often develops a slimy or sticky texture. If the meat feels unusually soft, slimy, or tacky to the touch, it’s no longer safe to eat.

Mold growth: Visible mold on cooked chicken is a definite sign of spoilage. Never consume chicken with any type of mold present.

It’s important to note that consuming spoiled chicken can lead to food poisoning. Symptoms may include nausea, vomiting, diarrhea, and fever. If you experience these symptoms after eating chicken, seek medical attention promptly.

Safe Reheating Practices for Leftover Cooked Chicken

When it comes to reheating leftover cooked chicken, safety should be your top priority. To ensure your chicken is safe to eat, always heat it to an internal temperature of 165°F (74°C). This can be achieved through various methods, each with its own advantages.

Microwave reheating is the quickest option. Place the chicken in a microwave-safe dish, cover it with a damp paper towel to retain moisture, and heat in short intervals, stirring occasionally for even heating. For oven reheating, preheat to 350°F (175°C), place the chicken in an oven-safe dish, cover with foil, and heat for about 20-25 minutes, depending on the quantity.

Stovetop methods can also be effective. For a moist result, try simmering the chicken in a small amount of broth or water. Alternatively, you can sauté it in a pan with a bit of oil for a crispy exterior.

Regardless of the method you choose, always use a food thermometer to verify that the chicken has reached the safe internal temperature. Insert the thermometer into the thickest part of the meat, avoiding bones or fat. By following these safe reheating practices, you can enjoy your leftover chicken without compromising on taste or safety.

Freezing Cooked Chicken (Extended Storage Options)

Freezing cooked chicken is an excellent way to extend its shelf life and ensure you always have a protein-rich meal option on hand. When properly stored, frozen cooked chicken can maintain its quality for up to four months. To maximize freshness, wrap the chicken tightly in freezer-safe plastic wrap or aluminum foil, then place it in a freezer bag, removing as much air as possible before sealing.

When it comes to thawing, there are several safe methods to choose from. The refrigerator method is the slowest but safest, allowing the chicken to thaw gradually over 24-48 hours. For quicker results, you can use the cold water method, submerging the sealed chicken in cold water and changing it every 30 minutes. Microwave thawing is the fastest option but requires immediate cooking afterward to prevent bacterial growth.

To maintain the quality of your frozen chicken, it’s crucial to prevent freezer burn. This can be achieved by minimizing air exposure through proper packaging and maintaining a consistent freezer temperature of 0°F (-18°C) or below. Labeling your packages with the date of freezing can help you keep track of storage times and ensure you use the oldest items first.

Health Risks Associated with Consuming Spoiled Chicken

Consuming spoiled chicken can lead to serious health risks, primarily due to the growth of harmful bacteria. As chicken begins to spoil, it becomes a breeding ground for various pathogens, including salmonella and listeria. These bacteria can cause severe foodborne illnesses, resulting in symptoms such as nausea, vomiting, diarrhea, and fever.

Salmonella, one of the most common culprits in chicken-related food poisoning, can lead to salmonellosis. This infection can be particularly dangerous for young children, the elderly, and those with weakened immune systems. Listeria, another potential threat, can cause listeriosis, which is especially risky for pregnant women and can lead to serious complications.

To minimize these health risks, it’s crucial to follow proper food safety precautions. Always store chicken at the correct temperature, cook it thoroughly, and consume it within the recommended timeframe. Be vigilant for signs of spoilage, such as changes in color, texture, or odor. When in doubt, it’s always safer to discard chicken that may have gone bad rather than risk potential foodborne illnesses.

read more
FishingRecreation & Sports

How to Catch Wahoo Fish (Tips, Techniques, and Gear)

How To Catch Wahoo Fish Tips Techniques And Gear

For anglers seeking the thrill of catching one of the ocean’s fastest predators, understanding how to catch Wahoo fish is essential. This guide covers recognizing their characteristics, preferred habitats, gear selection, and effective techniques. Whether you’re experienced or a novice, you’ll find insights on bait selection, seasonal patterns, and top destinations for landing these prized game fish. Prepare for an exhilarating adventure as we explore targeting Wahoos successfully.

Understanding the Wahoo Fish and Its Habitat

The wahoo fish, known scientifically as Acanthocybium solandri, is a prized catch among anglers due to its impressive speed and striking appearance. Characterized by its elongated body, sharp-toothed jaws, and vibrant blue-green coloration on its back that fades to silver on the sides, the wahoo is not only a visual marvel but also a formidable predator in the marine ecosystem.

Understanding the habitat of the wahoo fish is crucial for successful fishing endeavors. These fish are typically found in warm tropical and subtropical waters across the world’s oceans. They prefer open waters and are often located near structures such as reefs, drop-offs, or floating debris where they can hunt smaller fish.

Prime wahoo fishing locations include regions like the Gulf of Mexico, Caribbean Sea, and off the coasts of Hawaii and Southern California. Anglers looking to find wahoo should focus their efforts during late spring through early fall when these migratory fish are most active.

By understanding both the characteristics of wahoo fish and their preferred habitats, fishermen can increase their chances of encountering this elusive species in its natural environment.

Essential Gear for Wahoo Fishing

Essential Gear For Wahoo Fishing

When it comes to wahoo fishing, having the right gear is crucial to success. Wahoo are known for their speed and strength, making the selection of rods, reels, and lines particularly important.

Best Rods for Wahoo Fishing

The ideal rod for wahoo fishing should be both strong and flexible. A medium-heavy to heavy action rod is typically recommended. These rods provide the necessary backbone to handle the powerful runs of a wahoo while still offering enough sensitivity to detect subtle bites.

Reels for Wahoo Fishing

A high-quality reel is just as important as a good rod. For wahoo fishing, conventional reels with a high line retrieval rate are preferred. Look for reels that offer a smooth drag system capable of handling sudden bursts of speed without compromising on control. Lever drag reels are often favored due to their precision and durability.

Fishing Line Strength for Wahoo

Choosing the right fishing line can make all the difference when targeting wahoo. Given their aggressive nature and sharp teeth, a strong monofilament or braided line is essential. Most anglers recommend using lines with a strength rating between 50-80 pounds test. Additionally, incorporating a wire leader can help prevent break-offs from those razor-sharp teeth.

In summary, investing in quality rods, reels, and lines tailored specifically for wahoo fishing will significantly enhance your chances of landing these formidable fish. By understanding what makes each piece of gear effective against such powerful opponents, you can better prepare yourself for an exciting and successful fishing experience.

Top Techniques for Successfully Catching Wahoo Fish

Catching wahoo, one of the fastest fish in the ocean, requires specific techniques and a keen understanding of their behavior. Here are some top methods to increase your success rate when targeting these prized game fish.

Wahoo Trolling Techniques

One of the most effective ways to catch wahoo is through trolling. This technique involves dragging lures or bait behind a moving boat. Wahoo trolling techniques often focus on speed and depth, as these fish are known for their swift movements and preference for mid-water zones. Using planers or downriggers can help get your lures to the optimal depth where wahoo are likely to strike.

High-Speed Trolling for Wahoo

High-speed trolling is particularly effective for catching wahoo due to their rapid swimming capabilities. Speeds between 12-18 knots are commonly used in this technique. The high speed not only attracts wahoo but also helps in covering large areas of water quickly, increasing your chances of encountering a school. Specialized high-speed lures designed to withstand such velocities are essential.

Vertical Jigging for Wahoo

Vertical jigging is another productive method, especially when fishing over structures like reefs or drop-offs where wahoo tend to hunt. This technique involves dropping a heavy jig vertically into the water column and then rapidly retrieving it with an erratic motion. The sudden movements mimic injured prey, enticing wahoo to strike.

Best Lures for Catching Wahoo

Choosing the right lure can make all the difference when targeting wahoo. High-speed trolling lures such as jet heads, bullet heads, and weighted skirts are highly recommended due to their ability to maintain stability at high speeds. Additionally, vertical jigs with flashy colors and reflective surfaces can effectively attract attention during vertical jigging sessions.

By mastering these techniques and selecting the best lures suited for each method, anglers can significantly improve their chances of landing this elusive predator.

What Works Best When Targeting Wahoos?

When it comes to targeting wahoos, selecting the right bait can make all the difference in your fishing success. Wahoos are known for their speed and agility, making them a challenging yet rewarding catch. Understanding what works best in terms of bait can significantly increase your chances of landing one of these prized fish.

One of the most effective approaches is using live bait. The best bait for wahoo fish often includes live offerings such as small tuna, bonito, or mackerel. These live baits mimic the natural prey of wahoos and can entice even the wariest fish to strike.

However, artificial lures also have their place in wahoo fishing. High-speed trolling lures are particularly popular due to the wahoo’s preference for fast-moving targets. Some top baits to catch wahoos include jet heads, bullet heads, and high-speed plugs designed specifically for rapid trolling speeds.

The debate between live bait vs artificial lures for wahoos is ongoing among anglers. Live bait tends to produce a more natural presentation that can be irresistible to a hungry wahoo. On the other hand, artificial lures allow you to cover more water quickly and target fish that might not be actively feeding but are triggered by fast-moving objects.

Both live bait and artificial lures have their merits when it comes to catching wahoos. The best approach often depends on specific conditions such as water clarity, temperature, and current activity levels of the fish. By experimenting with both methods and paying attention to what works best in different scenarios, you can maximize your chances of success on your next wahoo fishing trip.

Seasonal Patterns to Catch Wahoos

Understanding the seasonal patterns of wahoo migration is crucial for any angler looking to maximize their catch rates. Wahoos, known for their speed and agility, exhibit distinct migration behaviors that vary throughout the year.

During the winter months, fishing for wahoos can be particularly rewarding. As water temperatures drop, these fish tend to migrate towards warmer waters, often found in tropical and subtropical regions. Winter fishing for wahoos is generally most successful in areas like the Caribbean and the Gulf of Mexico where they are more likely to congregate.

On the other hand, summer season wahoo catch rates can also be impressive but require a different strategy. During this period, wahoos are typically found in deeper offshore waters where they hunt for prey. Anglers targeting summer wahoos often venture further from shore and use high-speed trolling techniques to entice these fast swimmers.

Understanding wahoo migration patterns helps anglers plan their trips more effectively. By aligning your fishing efforts with these seasonal behaviors, you increase your chances of a successful outing whether you’re braving winter seas or enjoying summer’s calm waters.

Popular Destinations Around the World to Catch Big Wahoos

Wahoo fishing enthusiasts are always on the lookout for the best destinations to catch these fast and elusive game fish. Here are some of the most popular wahoos hotspots worldwide that promise thrilling fishing experiences.

1. Bermuda: Known for its crystal-clear waters and abundant marine life, Bermuda is a top destination for wahoo fishing. The island’s deep-sea fishing charters offer excellent opportunities to catch big wahoos, especially during the peak season from April to November.

2. Bahamas: The Bahamas is another prime location for wahoo fishing, particularly around Nassau and Bimini. The winter months, from November to March, are considered the best time to fish for wahoos in this region due to the cooler water temperatures that attract these speedy predators.

3. Mexico (Cozumel): Cozumel, an island off Mexico’s Yucatán Peninsula, is renowned for its vibrant marine ecosystem and exceptional wahoo fishing spots. Anglers flock here between November and February when wahoo activity peaks.

4. Florida Keys: The Florida Keys offer year-round wahoo fishing opportunities, with Islamorada being a standout location. This area provides easy access to deep waters where wahoos thrive, making it one of the best places to fish wahoos in North America.

4. Hawaii (Oahu): Oahu in Hawaii is famous not only for its stunning scenery but also as a premier destination for catching large wahoos or “ono” as they are locally known. The summer months provide optimal conditions for targeting these prized fish.

These destinations not only offer fantastic chances to hook big wahoos but also provide unforgettable experiences amidst breathtaking natural beauty. Whether you’re an experienced angler or a novice looking to try your hand at deep-sea fishing, these locations stand out as some of the best places worldwide to pursue this exhilarating sport.

read more
Home & FamilyHome Improvement

How to Unclog a Toilet (A Step-by-Step Guide for Homeowners)

How To Unclog A Toilet A Step By Step Guide For Homeowners

Understanding the importance of unclogging a toilet is essential for every homeowner. A clogged toilet is not just an inconvenience; it can lead to more severe plumbing issues if not addressed promptly. Knowing how to tackle common toilet problems can save you time, money, and the hassle of calling a plumber for minor issues.

One of the most frequent plumbing basics that every homeowner should familiarize themselves with is the process of unclogging a toilet. This skill is crucial because toilets can become clogged for various reasons, such as excessive toilet paper use or flushing non-flushable items. By learning how to handle these situations, you ensure that your household runs smoothly and avoid potential water damage from overflowing toilets.

Moreover, understanding these plumbing basics empowers homeowners to maintain their homes better. It allows them to identify when a problem requires professional intervention versus when it’s something they can handle on their own. In essence, knowing how to unclog a toilet equips homeowners with valuable knowledge that enhances their ability to manage and maintain their living spaces efficiently.

This guide covers plumbing basics, common clog causes, and necessary tools. Whether it’s a minor blockage or a stubborn clog, our step-by-step methods will restore your toilet’s functionality quickly and safely. Read on to master this common home maintenance task.

Identify the Cause of the Clog

Understanding what clogs toilets is essential for effectively addressing the issue. Toilet clogs can be caused by a variety of factors, and recognizing these common culprits can help in taking the right steps to resolve them.

One of the primary toilet clog causes is excessive toilet paper usage. While toilet paper is designed to dissolve in water, using too much at once can create blockages. Another frequent cause is flushing non-flushable items such as sanitary products, baby wipes, cotton balls, or even dental floss. These items do not break down easily and can obstruct the flow through pipes.

Initial checks for a clogged toilet should start with assessing what was recently flushed. If you suspect that an object other than waste or toilet paper has been flushed, it’s likely the source of your problem. Additionally, inspect whether multiple fixtures are draining slowly; this could indicate a more significant blockage in your main sewer line rather than just an isolated issue with your toilet.

By identifying these common clogging items and performing initial checks promptly, you can often prevent minor issues from escalating into more severe plumbing problems.

The Essential Tools You Need to Unclog a Toilet

The Essential Tools You Need To Unclog A Toilet

When faced with a clogged toilet, having the right tools on hand can make all the difference. Here’s a comprehensive list of essential plumbing tools that can help you tackle this common household issue effectively.

First and foremost, a reliable toilet plunger is indispensable. There are several types to consider, including the standard cup plunger and the flange plunger, which is specifically designed for toilets. The flange provides an extra seal to create more suction power, making it more effective at dislodging tough clogs.

Next on your plumbing tools list should be a plumbing snake or drain auger. This tool is particularly useful for breaking up and removing obstructions that are too stubborn for a plunger alone. A closet auger is another specialized type of snake designed specifically for toilets; its flexible cable can navigate through the bends in your toilet’s trap without causing damage.

Chemical drain cleaners are also an option but should be used with caution. While they can dissolve organic material blocking your pipes, they may also cause damage if overused or used improperly. Always follow the manufacturer’s instructions carefully when using these products.

By equipping yourself with these essential tools, you’ll be well-prepared to handle most toilet clogs efficiently and safely.

Step-by-Step Methods to Unclog Your Toilet Quickly and Safely

Unclogging a toilet can be a daunting task, but with the right methods, it can be done quickly and safely. Here’s a step-by-step guide to help you tackle this common household issue.

1. How to Use a Plunger Correctly

The plunger is often the first tool to reach for when dealing with a clogged toilet. To use it effectively, ensure you have the right type of plunger. A flange plunger is best suited for toilets. Place the rubber cup of the plunger into the toilet bowl, ensuring it covers the drain hole completely. Push down gently at first to get rid of any air trapped inside, then pump vigorously up and down while maintaining the seal. After several pumps, pull up sharply to break the seal and see if water starts draining. Repeat as necessary.

2. Unclogging with a Plumbing Snake

If plunging doesn’t do the trick, a plumbing snake (or auger) might be your next best option. Insert the end of the snake into the toilet drain and begin turning its handle clockwise to extend it through the pipe bends and obstructions. Continue turning until you feel resistance; this indicates that you’ve reached an obstruction. Push gently while rotating until you feel less resistance; this means you’ve broken through or hooked onto whatever is causing the clog. Slowly retract and remove debris before flushing to check if normal flow has been restored.

3. Using Chemical Drain Cleaners Safely

As a last resort, chemical drain cleaners can be effective but should be used cautiously due to their caustic nature which can damage pipes over time or cause harm if mishandled. Always read and follow manufacturer instructions carefully, typically, you’ll pour an appropriate amount into your toilet bowl and let it sit for 15-30 minutes before flushing with hot water (if recommended). Ensure good ventilation in your bathroom during this process.

By following these steps on how to use a plunger correctly, unclogging with a plumbing snake, or using chemical drain cleaners safely, you can efficiently address most toilet clogs without professional help.

What to Do If the Clog Won’t Budge

Encountering a stubborn clog can be frustrating, but there are several advanced unclogging techniques you can try before calling in professional help. Persistent clogs often require more than just basic plunging or over-the-counter solutions. Here’s what you can do:

1. Use a Plumbing Snake: A plumbing snake, or auger, is a flexible tool designed to navigate through pipes and break up blockages. Insert the snake into the drain and turn the handle to push it deeper until you feel resistance. Continue rotating the handle to dislodge the clog.

2. Try a Wet/Dry Vacuum: For more severe clogs, a wet/dry vacuum might be effective. Set it to liquid mode, create a tight seal over the drain with its hose, and let it suck out the blockage.

3. Chemical Drain Cleaners: Use chemical drain cleaners as a last resort due to their harshness on pipes and potential environmental impact. Follow manufacturer instructions carefully to avoid damage.

4. Hydro Jetting: This method involves using high-pressure water jets to clear out debris from your pipes. While highly effective for persistent clogs, hydro jetting typically requires specialized equipment handled by professionals.

If these methods fail or if you’re uncomfortable attempting them yourself, it’s time to consider when to call a plumber. Persistent clogs can sometimes indicate underlying issues such as pipe damage or deeper blockages that need expert attention.

How to Avoid Future Clogs in Your Toilet

Maintaining a clog-free toilet is essential for a smoothly functioning household. By following some simple toilet maintenance tips, you can prevent future clogs and avoid the inconvenience and expense of dealing with blockages.

First and foremost, understanding what items are flushable and non-flushable is crucial. Only human waste and toilet paper should be flushed down the toilet. Non-flushable items such as wet wipes, feminine hygiene products, cotton balls, dental floss, diapers, and paper towels should be disposed of in a trash bin. These items do not break down easily and can cause significant blockages in your plumbing system.

Another important tip is to use an appropriate amount of toilet paper. Excessive use of toilet paper can lead to clogs even though it is designed to be flushable. Opt for high-quality, septic-safe toilet paper that dissolves more easily in water.

Regularly checking for early signs of potential clogs can also help you avoid bigger issues down the line. If you notice that your toilet is flushing slower than usual or making gurgling sounds, it might be time to inspect your plumbing system or call a professional plumber for assistance.

Additionally, consider implementing routine maintenance practices such as using enzyme-based cleaners that help break down waste materials more effectively without harming your pipes or septic system.

By following these preventive measures and being mindful about what goes into your toilet, you can significantly reduce the risk of future clogs and ensure a hassle-free bathroom experience.

read more
Food & Beverage

What is Boba Made Of? A Deep Dive into the Ingredients and Their Origins

What Is Boba Made Of A Deep Dive Into The Ingredients And Their Origins

Boba tea, or bubble tea, is popular for its unique texture and delightful flavors. Central to this drink are the chewy tapioca pearls made from cassava root. This article explores boba’s origins, ingredients, production process, types, flavors, nutritional information, and popular add-ins that enhance bubble tea. Join us to uncover everything about your favorite drink’s key components.

The Basic Ingredients of Boba (Tapioca Pearls Explained)

Boba, a beloved component of bubble tea, has gained immense popularity worldwide. But what exactly is boba made of? The primary ingredient in boba is tapioca pearls, which are small, chewy spheres that add a delightful texture to the beverage.

Tapioca pearls are made from tapioca starch, which is derived from the cassava root. This starchy tuber is native to South America but has found its way into various cuisines across the globe. To create tapioca pearls, the starch from the cassava root is extracted and processed into small balls. These balls are then boiled until they achieve their characteristic chewy consistency.

The basic ingredients for making traditional tapioca pearls include tapioca starch and water. However, additional components like sugar or caramel can be added during preparation to enhance flavor and color. Once cooked, these pearls can be soaked in sweeteners like honey or syrup to further enrich their taste before being added to bubble tea.

Understanding what goes into your bubble tea can enhance your appreciation for this delightful drink. The next time you sip on a cup of bubble tea, you’ll know that those deliciously chewy tapioca pearls come from the humble cassava root and a bit of culinary magic involving tapioca starch.

The Process of Making Tapioca Pearls (From Cassava Root to Boba)

The Process Of Making Tapioca Pearls From Cassava Root To Boba

Tapioca pearls, commonly known as boba, are a staple in bubble tea and have captivated taste buds worldwide. Understanding the process of making tapioca pearls from cassava root to boba is both fascinating and informative.

The journey begins with the cassava root, a starchy tuber native to South America. The first step in making tapioca pearls involves harvesting and peeling the cassava root. Once peeled, the roots are grated into a fine pulp. This pulp is then washed and strained to extract the starchy liquid.

Next, this liquid undergoes a drying process where it forms tapioca starch powder. This powder is crucial for creating the chewy texture that boba enthusiasts adore. The starch is mixed with hot water to form a dough-like consistency. Skilled workers knead this dough until it becomes smooth and pliable.

The dough is then rolled into long cylindrical shapes before being cut into small pieces. These pieces are hand-rolled into tiny balls, which will eventually become tapioca pearls. The size of these balls can vary depending on preference but typically ranges between 1/8 to 1/4 inch in diameter.

Once shaped, the raw tapioca pearls are boiled until they achieve their distinctive chewy texture—a process that usually takes about an hour. After boiling, they are soaked in cold water to prevent sticking and maintain their shape.

Finally, these freshly made boba pearls can be sweetened by soaking them in sugar syrup or honey before being added to your favorite bubble tea drink.

This meticulous process of transforming cassava root into delightful tapioca pearls highlights not only traditional craftsmanship but also modern culinary innovation in boba production.

Types of Boba (Exploring Different Varieties and Flavors)

Boba tea, also known as bubble tea, has taken the world by storm with its delightful textures and flavors. One of the most intriguing aspects of this beverage is the variety of boba pearls that can be added to it. Let’s explore some popular types and their unique characteristics.

Black Boba vs White Boba

The most common type of boba is black boba, which gets its color from brown sugar or caramel added during the cooking process. These pearls are known for their chewy texture and slightly sweet flavor, making them a favorite among traditional boba tea enthusiasts. On the other hand, white boba pearls are made from tapioca starch without any additional coloring or flavoring agents, resulting in a more neutral taste and a slightly firmer texture.

Flavored Boba Pearls

For those looking to add an extra burst of flavor to their drink, flavored boba pearls are an excellent choice. These pearls come infused with various flavors such as strawberry, mango, or lychee. The infusion process ensures that each bite delivers a delicious taste that complements the drink perfectly.

Popping Boba

Popping boba offers a unique twist on traditional tapioca balls. Unlike their chewy counterparts, popping boba are filled with fruit juice and burst open when bitten into, releasing a refreshing splash of flavor. Commonly found in fruity teas and desserts, popping boba come in flavors like passion fruit, blueberry, and kiwi.

Jelly Boba Varieties

Jelly boba adds another layer of texture to your drink experience. Made from ingredients like coconut or konjac root powder, these jellies can be cut into various shapes such as cubes or strips. They come in different flavors including coffee jelly for those who enjoy a hint of bitterness or aloe vera jelly for a more subtle taste.

Each type of boba brings its own unique flair to bubble tea drinks. Whether you prefer the classic chewiness of black or white pearls or enjoy experimenting with flavored varieties and popping sensations, there’s always something new to discover in every sip!

Nutritional Information (What’s Really in Your Cup of Boba Tea?)

Bubble tea, also known as boba tea, has become a popular beverage worldwide. However, understanding its nutritional profile is essential for those who enjoy this trendy drink. Let’s dive into the bubble tea nutrition facts to see what’s really in your cup.

One of the primary components of bubble tea is tapioca pearls. These chewy spheres are made from cassava starch and contribute significantly to the drink’s calorie count. On average, a serving of tapioca pearls can add around 150 calories to your beverage. It’s important to note that these calories come primarily from carbohydrates, with little nutritional value in terms of vitamins or minerals.

The base of bubble tea can vary widely (from milk teas to fruit-flavored teas) each bringing its own set of nutritional elements. Traditional milk teas often contain dairy or non-dairy creamers that add both fats and sugars into the mix. This combination can lead to a high-calorie count per serving, sometimes reaching up to 300-400 calories for a large cup.

Sugar content in bubble tea is another crucial factor to consider. Many boba teas are sweetened with syrups or additional sugar, which can significantly increase the overall sugar intake per serving. Some estimates suggest that a typical serving could contain anywhere from 30-60 grams of sugar, depending on how sweet you like it.

Despite these considerations, there are some health benefits of boba tea when consumed in moderation. The tea contains antioxidants and various compounds that may offer health benefits such as improved digestion and reduced inflammation.

While bubble tea can be an enjoyable treat with its unique flavors and textures, being aware of its nutritional content can help you make more informed choices about how often you indulge in this delightful beverage.

Beyond Tapioca (Other Popular Add-Ins for Bubble Tea)

Bubble tea, also known as boba tea, has taken the world by storm with its unique combination of flavors and textures. While tapioca pearls are the classic add-in that many people associate with bubble tea, there is an array of other delightful toppings that can elevate your drink experience.

One popular option is fruit jellies for bubble tea. These come in various flavors such as mango, lychee, and strawberry, adding a burst of fruity sweetness to your milk tea. Unlike the chewy texture of tapioca pearls, fruit jellies offer a refreshing contrast and are perfect for those who prefer a lighter bite.

Another favorite among bubble tea enthusiasts is grass jelly. This herbal jelly has a slightly bitter taste that complements the sweetness of milk tea wonderfully. Grass jelly is known for its smooth texture and cooling properties, making it an excellent choice for hot summer days.

For those looking to experiment further with their bubble tea toppings, consider adding popping boba or aloe vera cubes. Popping boba are small spheres filled with fruit juice that burst in your mouth, providing an exciting twist to each sip. Aloe vera cubes offer a subtle flavor and a crunchy texture that pairs well with both fruity and creamy teas.

Exploring these diverse bubble tea toppings can transform your usual drink into a customized treat tailored to your taste preferences. Whether you stick with traditional tapioca pearls or venture into new territory with fruit jellies and grass jelly, there’s no shortage of ways to enjoy this beloved beverage.

read more
Disease & Illness

7 Effective Ways to Overcome ADHD Paralysis and Boost Productivity

Effective Ways To Overcome Adhd Paralysis And Boost Productivity

Struggling with ADHD paralysis can hinder productivity and make tasks feel insurmountable. This guide offers seven strategies to overcome this challenge and enhance efficiency. From breaking tasks into steps to using time management techniques like the Pomodoro Method, these tips cater to individuals with ADHD. By setting clear goals, using organizational tools, creating a supportive environment, practicing mindfulness to stay present and focused, and seeking professional help when needed, you can regain control and boost productivity.

1. Break Tasks into Smaller Steps to Manage Overwhelm

Managing overwhelm, especially for individuals with ADHD, can be significantly improved by breaking tasks into smaller, more manageable steps. This approach, known as task breakdown or task segmentation, is a cornerstone of effective project management for ADHD.

The concept is simple yet powerful: instead of tackling a large task all at once, divide it into smaller steps that are easier to handle. This approach can bring a sense of relief, especially for those with ADHD, as each small step feels less daunting and provides a clear path forward. For instance, if you need to write a report, you could break it down into steps such as researching the topic, creating an outline, writing the introduction, and so on.

Task segmentation not only makes the workload seem more manageable but also helps maintain focus and motivation. Each completed step brings a sense of accomplishment and progress, which can be particularly beneficial for those struggling with attention regulation. By consistently applying this method in your daily routine or larger projects, you create an organized framework that supports productivity and reduces feelings of overwhelm.

In summary, breaking tasks into smaller steps is an effective strategy in project management for ADHD. It simplifies complex tasks into achievable actions and fosters a structured approach to managing responsibilities without becoming overwhelmed.

2. Use Time Management Techniques like the Pomodoro Method

Effective time management is crucial for enhancing productivity, especially for individuals with ADHD. One highly recommended technique is the Pomodoro Method. This method involves breaking work into intervals, usually 25 minutes in length, separated by short breaks. These intervals are called “Pomodoros,” named after the Italian word for tomato, inspired by the tomato-shaped kitchen timer.

The Pomodoro Technique can be particularly beneficial for managing time with ADHD because it creates a structured environment and reduces the overwhelming feeling of large tasks. By focusing on one task at a time within a set period, it helps to minimize distractions and maintain concentration.

Another useful strategy is time blocking, which involves dedicating specific blocks of time to different tasks or activities throughout your day. This method can help create a visual schedule that makes it easier to stay on track and ensures that high-priority tasks receive adequate attention.

Integrating these productivity techniques into your daily routine can significantly improve your ability to manage time effectively. Whether you choose the Pomodoro Technique or time blocking, both methods offer structured approaches that cater to the unique challenges faced by individuals with ADHD.

3. Set Clear and Achievable Goals to Stay Focused

Adhd Paralysis Set Clear And Achievable Goals To Stay Focused

Setting clear and achievable goals is a crucial strategy for maintaining focus, especially for individuals with ADHD. Goal setting for ADHD involves breaking down larger tasks into smaller, more manageable objectives. By doing so, it becomes easier to stay on track and avoid feeling overwhelmed.

Start by defining what you want to achieve in specific terms. Clear objectives provide a roadmap that guides your actions and decisions. For example, instead of setting a vague goal like “be more organized,” aim for something concrete such as “spend 10 minutes every evening organizing my workspace.”

Achievable goals are equally important. Setting the bar too high can lead to frustration and loss of motivation. Focus strategies recommend starting with small, attainable steps that build confidence and create momentum. For instance, if you’re working on a big project, break it down into daily or weekly tasks that contribute to the overall goal.

By setting clear and achievable goals, you create a structured environment where focus can thrive. This approach not only helps in managing ADHD but also enhances productivity and overall well-being.

4. Implement Organizational Tools and Systems to Stay on Track

Implementing organizational tools and systems is crucial for staying on track, especially for individuals with ADHD. The right tools can make a significant difference in managing daily tasks and long-term projects effectively. Here are four key strategies to consider:

1. Utilize Organizational Tools for ADHD: There are numerous tools specifically designed to help individuals with ADHD manage their time and tasks better. These include planners that break down tasks into smaller, manageable steps, visual timers to keep track of time spent on activities, and reminder apps that prompt you about upcoming deadlines.

2. Adopt Robust Planning Systems: A well-structured planning system can be a game-changer. Systems like the Eisenhower Matrix or the Bullet Journal Method can help prioritize tasks based on urgency and importance. By categorizing your responsibilities, you can focus on what truly matters without feeling overwhelmed.

3. Leverage Task Management Apps: Modern task management apps like Todoist, Trello, or Asana offer features tailored to enhance productivity and organization. These apps allow you to create detailed task lists, set deadlines, assign priorities, and even collaborate with others seamlessly.

4. Follow Practical Organizational Tips: Simple yet effective tips such as decluttering your workspace regularly, setting specific goals for each day, and breaking down large projects into smaller tasks can significantly improve your organizational skills. Additionally, establishing a consistent routine helps in maintaining a structured approach to daily activities.

By integrating these organizational tools and systems into your daily life, you can enhance productivity and reduce the stress associated with managing multiple responsibilities simultaneously.

5. Create a Supportive Environment with Minimal Distractions

Creating a supportive environment with minimal distractions is crucial for enhancing productivity, especially for individuals with ADHD. An ADHD-friendly environment can significantly reduce distractions and help maintain focus on tasks. Here are five strategies to create such a workspace:

1. Organize Your Space: A clutter-free workspace can make a world of difference. Keep your desk tidy by using organizers for papers, pens, and other office supplies. An organized space reduces visual distractions and helps you find what you need quickly.

2. Use Noise-Canceling Headphones: Background noise can be a significant distraction. Investing in noise-canceling headphones can help block out unwanted sounds, allowing you to concentrate better on your work.

3. Implement Time Management Techniques: Techniques like the Pomodoro Technique, which involves working in short bursts followed by breaks, can enhance focus and productivity. Use timers to remind yourself when it’s time to take a break or switch tasks.

4. Create Visual Cues: Use sticky notes or whiteboards for reminders and to-do lists. Visual cues can help keep important tasks at the forefront of your mind without overwhelming you with information.

5. Personalize Your Environment: Tailor your workspace to suit your needs by adding elements that make you feel comfortable and focused, such as plants or personal photos. A supportive workspace that feels personalized can boost motivation and productivity.

By implementing these strategies, you can create an ADHD-friendly environment that reduces distractions and supports sustained productivity throughout the day.

6. Practice Mindfulness and Relaxation Techniques to Reduce Stress

Mindfulness and relaxation techniques are powerful tools for managing stress, especially for individuals dealing with ADHD paralysis. Practicing mindfulness involves focusing on the present moment and observing your thoughts and feelings without judgment. This practice can help reduce stress by promoting a sense of calm and clarity.

One effective mindfulness practice is deep breathing exercises. By taking slow, deep breaths, you can activate your body’s relaxation response, which helps lower heart rate and blood pressure. Another technique is progressive muscle relaxation, where you systematically tense and then relax different muscle groups in your body to release physical tension.

Incorporating regular meditation into your routine can also be beneficial. Even just a few minutes of seated meditation each day can help improve focus and decrease anxiety levels. Guided imagery is another helpful technique; it involves visualizing peaceful scenes or scenarios to create a sense of tranquility.

For those with ADHD paralysis, structured mindfulness practices like these can be particularly valuable. They offer a way to break the cycle of overwhelming thoughts and bring attention back to manageable tasks at hand.

By integrating these mindfulness practices into daily life, individuals can experience significant stress reduction, leading to improved mental well-being and productivity.

7 . Seek Professional Help When Needed

Managing ADHD can be challenging, and sometimes professional help is essential for effective treatment and support. Seeking professional help for ADHD can provide you with tailored strategies to manage symptoms and improve daily functioning.

Therapy Options: Various therapy options are available to individuals with ADHD. Cognitive Behavioral Therapy (CBT) is particularly effective in helping patients develop coping strategies, organizational skills, and emotional regulation techniques. Other therapeutic approaches like mindfulness-based therapies can also be beneficial.

Coaching Support: ADHD coaches specialize in helping individuals set goals, develop time management skills, and maintain focus on tasks. Coaching support can be a valuable resource for both children and adults with ADHD, providing personalized guidance to navigate daily challenges.

Medical Advice: Consulting a healthcare provider for medical advice is crucial when managing ADHD. A medical professional can evaluate your symptoms, provide a diagnosis, and discuss medication options if necessary. Medications such as stimulants or non-stimulants may be prescribed to help regulate attention and behavior.

Seeking professional help ensures that you have access to the best resources and expertise available, allowing you to effectively manage your ADHD symptoms and lead a more balanced life.

read more
ExerciseHealth & Fitness

Aerial Yoga (What It Is, Its Benefits, and How to Get Started)

Aerial Yoga What It Is Its Benefits And How To Get Started

Aerial yoga combines yoga, Pilates, and dance using a suspended hammock. It aids in challenging poses and deeper stretches, improving flexibility, strength, balance, relaxation, and mindfulness. This guide covers equipment choices, clears misconceptions, teaches basic poses, and integrates aerial yoga into your fitness routine.

What Is Aerial Yoga?

Aerial yoga, also known as anti-gravity yoga, is a unique form of exercise that combines traditional yoga poses, pilates, and dance with the use of a suspended hammock. This innovative practice allows participants to perform various poses while being supported by a soft fabric sling hanging from the ceiling.

The aerial yoga definition encompasses more than just physical fitness; it also aims to improve mental well-being and flexibility. By practicing aerial yoga, individuals can experience deeper stretches and inversions without putting too much strain on their joints and spine. This is particularly beneficial for those who may find traditional mat-based exercises challenging.

An introduction to aerial yoga typically involves learning how to safely use the hammock for support while transitioning between different poses. Beginners are often guided through basic movements that help build strength and confidence in using the apparatus. As practitioners become more comfortable, they can explore more advanced techniques that involve flips, spins, and complex stretches.

Understanding what is aerial yoga can open up new possibilities for enhancing your fitness routine. Whether you’re seeking improved flexibility, better posture, or simply a fun way to exercise, aerial yoga offers an exciting alternative that caters to various fitness levels and interests.

The Unique Benefits of Aerial Yoga for Your Body and Mind

The Unique Benefits Of Aerial Yoga For Your Body And Mind

Aerial yoga, an innovative form of exercise that combines traditional yoga poses with the use of a hammock or silk apparatus, offers a unique blend of physical and mental benefits. One of the primary aerial yoga benefits is its ability to enhance flexibility and strength. By performing poses while suspended in the air, practitioners can achieve deeper stretches and engage muscles that are often neglected in ground-based exercises.

The health benefits of aerial yoga extend beyond just physical improvements. This practice is particularly effective in decompressing the spine, which can alleviate back pain and improve overall posture. The anti-gravity nature of aerial yoga allows for a low-impact workout that reduces stress on joints while still providing a full-body workout.

In addition to physical advantages, there are significant mental benefits of aerial yoga. The practice encourages mindfulness and focus as it requires concentration to maintain balance and execute movements correctly. This heightened state of awareness can lead to reduced stress levels and improved mental clarity.

Furthermore, the sense of accomplishment from mastering challenging poses can boost self-confidence and foster a positive mindset. Overall, the combination of physical exertion and mindful practice makes aerial yoga an excellent choice for those looking to improve both their body and mind simultaneously.

Getting Started with Aerial Yoga (Essential Tips and Equipment)

Embarking on your aerial yoga journey can be both exciting and a bit daunting. This unique form of exercise combines traditional yoga poses, Pilates, and dance with the use of a hammock or silk fabric suspended from the ceiling. To help you get started with aerial yoga, we’ve compiled some essential tips and necessary equipment to ensure a smooth beginning.

Beginner Tips for Aerial Yoga

1. Find a Qualified Instructor: Before diving into aerial yoga, it’s crucial to find an experienced instructor who can guide you safely through the poses. Look for certified professionals who have a background in both yoga and aerial techniques.

2. Start Slow: As with any new fitness routine, it’s important to start slow and gradually build your strength and flexibility. Begin with beginner-level classes that focus on foundational moves before progressing to more advanced sequences.

3. Listen to Your Body: Pay close attention to how your body feels during each session. Aerial yoga involves hanging upside down and other unfamiliar positions that may take time for your body to adjust to. If something doesn’t feel right, don’t hesitate to modify the pose or take a break.

4. Dress Comfortably: Wear fitted clothing that allows for full range of motion but isn’t so loose that it gets tangled in the hammock. Avoid wearing jewelry or anything that could snag on the fabric.

Necessary Equipment for Aerial Yoga

1. Aerial Hammock/Silk Fabric: The main piece of equipment you’ll need is an aerial hammock made from strong, high-quality silk fabric designed specifically for aerial practices. Ensure it is securely installed by professionals if setting up at home.

2. Supportive Mat: While much of aerial yoga takes place off the ground, having a supportive mat underneath can provide comfort during floor exercises and serve as cushioning in case of falls.

3. Carabiners & Rigging Hardware: High-quality carabiners and rigging hardware are essential for safely securing your hammock to its anchor points on the ceiling or frame structure.

4. Ceiling Mounts/Frames: If practicing at home, you’ll need sturdy ceiling mounts or freestanding frames specifically designed to bear weight safely during inversions and other movements.

By following these beginner tips for aerial yoga and ensuring you have all necessary equipment ready, you’ll be well-prepared to dive into this invigorating practice confidently!

Common Misconceptions About Aerial Yoga Debunked

Aerial yoga has gained popularity in recent years, but with its rise, several misconceptions have also emerged. Let’s debunk some common aerial yoga myths and uncover the truth about this unique practice.

Myth 1. Aerial Yoga is Only for the Extremely Fit

One of the most pervasive misconceptions about aerial yoga is that it’s only suitable for those who are already extremely fit or flexible. In reality, aerial yoga can be adapted to suit various fitness levels. The use of a hammock provides support and allows practitioners to perform poses with greater ease, making it accessible even for beginners.

Myth 2. It’s Dangerous

Another common myth is that aerial yoga is inherently dangerous due to the use of suspended hammocks. While any physical activity carries some risk, aerial yoga is generally safe when practiced under proper guidance. Certified instructors ensure that hammocks are securely anchored and teach participants how to use them safely.

Myth 3. It’s Just a Trendy Fad

Some believe that aerial yoga is merely a passing trend with no real benefits. However, this practice combines traditional yoga poses with elements of acrobatics and Pilates, offering a comprehensive workout that improves strength, flexibility, and balance. Its holistic approach contributes significantly to both physical and mental well-being.

Myth 4. You Need Special Equipment at Home

Many people think they need to invest in expensive equipment to try aerial yoga at home. While having your own hammock can be beneficial for home practice, many studios provide all necessary equipment during classes. This allows newcomers to experience the benefits without an initial investment.

By debunking these misconceptions about aerial yoga, we hope more people will feel encouraged to explore this enriching practice without hesitation or fear.

A Beginner’s Guide to Basic Aerial Yoga Poses and Techniques

Aerial yoga, a unique blend of traditional yoga and aerial arts, offers a refreshing way to enhance your flexibility, strength, and mindfulness. For beginners eager to explore this practice, starting with basic aerial yoga poses and techniques is essential. Here are some easy poses in aerial yoga that will help you get started on the right foot.

1. The Aerial Mountain Pose: This foundational pose helps you get accustomed to using the hammock. Stand with your feet hip-width apart, holding onto the fabric at waist height. Engage your core and maintain an upright posture as you breathe deeply.

2. Supported Chair Pose: Begin by sitting in the hammock like a swing with both feet flat on the ground. Lean back slightly while gripping the fabric for support. This pose strengthens your legs and improves balance without putting strain on your joints.

3. Star Inversion: An excellent introduction to inversions, this pose allows you to experience being upside down safely. With the hammock supporting your hips, let yourself hang freely while extending your arms and legs outward like a starfish.

4. Floating Savasana: End your practice with this relaxing technique by lying fully extended in the hammock like you’re in a cocoon. This pose promotes deep relaxation and helps release tension from both body and mind.

By incorporating these basic aerial yoga techniques into your routine, you’ll build confidence and develop a solid foundation for more advanced poses as you progress in your practice of aerial yoga poses for beginners.

How to Incorporate Aerial Yoga into Your Regular Fitness Routine

Incorporating aerial yoga into your regular fitness routine can bring a fresh and dynamic dimension to your workouts. Combining fitness routines with aerial yoga not only enhances flexibility and strength but also provides a unique way to engage different muscle groups. Here’s how you can effectively integrate aerial fitness into your workouts:

1. Start with the Basics: If you’re new to aerial yoga, begin by familiarizing yourself with the fundamental poses and techniques. Many studios offer beginner classes that focus on building foundational skills.

2. Schedule Regular Sessions: Consistency is key when integrating any new activity into your fitness routine. Aim for at least one or two aerial yoga sessions per week to allow your body to adapt and improve.

3. Combine Strength Training: Aerial yoga can complement traditional strength training exercises. Use it as a warm-up or cool-down session to stretch out muscles worked during weightlifting or resistance training.

4. Focus on Core Engagement: Aerial yoga requires significant core stability, making it an excellent addition for enhancing core strength. Incorporate poses that challenge your balance and engage your abdominal muscles.

5. Customize Your Routine: Tailor your aerial yoga practice to fit your personal fitness goals. Whether you’re looking to increase flexibility, build strength, or improve balance, there are specific poses and sequences that can help you achieve these objectives.

6. Listen to Your Body: As with any new exercise regimen, it’s important to listen to your body and avoid pushing yourself too hard too soon. Gradually increase the intensity of your sessions as you become more comfortable with the movements.

By integrating aerial fitness into workouts, you’ll not only diversify your exercise routine but also enjoy the numerous physical benefits it offers. With dedication and practice, aerial yoga can become a rewarding component of a well-rounded fitness plan.

Conclusion- Embrace the Transformation with Aerial Yoga Today!

Aerial yoga offers a unique and transformative experience that combines traditional yoga poses, Pilates, and dance with the support of a hammock. This innovative form of exercise not only enhances flexibility and strength but also provides a sense of weightlessness that can alleviate stress and improve mental clarity.

The benefits of aerial yoga are extensive. Physically, it helps in decompressing the spine, improving joint mobility, and increasing overall body strength. Mentally, the practice encourages mindfulness and relaxation by allowing practitioners to focus on their movements and breath in a new dimension.

Whether you’re a seasoned yogi or new to the practice, aerial yoga presents an opportunity to challenge yourself in new ways while reaping numerous health benefits. It’s an excellent way to diversify your fitness routine, build confidence, and enjoy the exhilarating sensation of floating.

Embrace this transformative journey today by incorporating aerial yoga into your wellness regimen. The unique combination of physical exertion and mental tranquility promises not just a workout but an uplifting experience that can enhance your overall well-being.

read more
BusinessCareers

How to Become a Real Estate Agent in California (A Step-by-Step Guide)

How To Become A Real Estate Agent In California A Step By Step Guide

The California real estate market offers career growth and financial opportunities. This guide covers every step, from meeting eligibility to passing the licensing exam and finding a sponsoring broker. Achieve success in one of America’s hottest markets.

Why Become a Real Estate Agent in California?

Choosing a real estate career in California offers numerous advantages that make it an appealing profession. The California real estate market is one of the most dynamic and lucrative in the United States, providing ample opportunities for growth and financial success.

One of the primary benefits of being a real estate agent in California is the high earning potential. With property values consistently on the rise, commissions from sales can be significantly higher compared to other states. Additionally, the diverse range of properties (from luxury estates to commercial spaces) ensures that there is always something new and exciting to work with.

Flexibility is another key advantage. A career as a real estate agent allows you to set your own schedule, making it easier to balance work with personal commitments. This autonomy can lead to better job satisfaction and work-life balance.

Moreover, being part of such a competitive market means continuous learning and professional development. The ever-changing landscape requires agents to stay updated on market trends, legal changes, and innovative marketing strategies. This constant evolution not only keeps the job interesting but also enhances your skill set over time.

In summary, pursuing a real estate career in California offers substantial financial rewards, flexibility, and ongoing professional growth. These benefits make it an attractive option for those looking to enter or advance within this vibrant industry.

Step-by-Step Guide to Become a Real Estate Agent in California

Step By Step Guide To Become A Real Estate Agent In California

Becoming a real estate agent in California is a structured process that involves several key steps. Here are the steps you need to follow to launch your career in this dynamic industry:

Step 1. Meet the Basic Requirements

To embark on the journey of becoming a real estate agent in California, it’s crucial to first meet the basic requirements laid out by the state. Understanding these prerequisites will ensure a smooth start to your new career path.

The initial step involves verifying your eligibility to apply for a real estate license in California. According to state regulations, you must be at least 18 years old. This age requirement ensures that applicants are legally considered adults and capable of entering into binding contracts.

Next, educational qualifications come into play. Prospective real estate agents must have completed high school or obtained an equivalent diploma, such as a GED. This foundational education is necessary because it equips candidates with essential skills in reading, writing, and mathematics, which are vital for handling real estate transactions and understanding legal documents.

Meeting these basic criteria is just the first step in how to become a real estate agent in California. Ensuring you fulfill these initial requirements sets the stage for subsequent steps like completing pre-license education courses and passing the state licensing exam. By adhering to these guidelines from the outset, you pave the way for a successful career in real estate within California’s dynamic market.

Step 2. Complete the Required Pre-Licensing Education

Before you can embark on your journey as a licensed real estate agent in California, completing the required pre-licensing education is a crucial step. This involves enrolling in and successfully finishing specific real estate courses designed to equip you with the foundational knowledge needed for the profession.

California mandates that aspiring real estate agents complete 135 hours of pre-licensing education. These hours are divided into three main courses: Real Estate Principles (45 hours), Real Estate Practice (45 hours), and an elective course (45 hours) that can be chosen from a list of approved subjects such as Real Estate Finance, Legal Aspects of Real Estate, or Property Management.

It’s essential to ensure that these courses are taken through accredited real estate schools in California. Accredited institutions adhere to state guidelines and provide comprehensive training that covers all necessary aspects of real estate practice, from legal considerations to practical sales techniques. Many schools offer flexible learning options, including online classes, which can be particularly beneficial if you have other commitments.

Once you’ve completed these courses, you’ll receive certificates of completion which are required when applying for your real estate license exam. This step not only prepares you academically but also gives you confidence as you move forward in your new career path.

Step 3. Submit Your Application and Fingerprints to the DRE

Once you have completed your required coursework, the next crucial step is to submit your application and fingerprints to the Department of Real Estate (DRE). This step is essential for obtaining your real estate license and involves a few key components.

First, please make sure that you have thoroughly filled out the DRE application form. Accuracy is critical here; any mistakes or omissions can delay the processing time. The application will ask for personal information, educational background, and details about your completed coursework.

Next comes fingerprinting, a mandatory part of the DRE application process. You must get your fingerprints taken at an authorized Live Scan service provider. The fingerprinting process helps in conducting a thorough background check, which is required for all prospective real estate agents in California.

Here are some useful Real Estate Department application tips:

  1. Double-check all entries on your application form.
  2. Schedule your fingerprinting appointment as soon as possible.
  3. Keep copies of all submitted documents for your records.
  4. Pay attention to any additional instructions provided by the DRE.

Step 4. Pass the California Real Estate Licensing Exam

Passing the California Real Estate Licensing Exam is a significant milestone in your journey to becoming a licensed real estate agent. Proper preparation is key to ensuring success on your first try. Here are some essential tips and resources to help you ace the exam.

First, invest in quality study guides for the licensing exam. These guides provide comprehensive coverage of all topics you’ll encounter on the test, including property laws, real estate practices, and ethical considerations. Many study guides also offer practice questions that mimic the style and difficulty of those on the actual exam, helping you get accustomed to what you’ll face.

Next, consider enrolling in a real estate exam preparation course. These courses often include interactive sessions with experienced instructors who can clarify complex concepts and offer valuable test-taking strategies. Additionally, many prep courses provide access to online resources such as practice exams and flashcards that can reinforce your learning.

Consistency is crucial when studying for the real estate test. Create a study schedule that allows you to review material regularly without overwhelming yourself. Break down topics into manageable sections and set daily or weekly goals to keep yourself on track.

Finally, take care of yourself leading up to exam day. Ensure you’re getting enough rest, eating well, and managing stress effectively so you’re in peak condition when it’s time to take the test.

By utilizing these strategies you’ll be well-equipped to pass the California Real Estate Licensing Exam on your first try.

Step 5. Find a Sponsoring Broker and Launch Your Career

Finding a sponsoring broker is a crucial step in starting your real estate career in California. A sponsoring broker not only provides the necessary support and resources but also helps you navigate the complexities of the industry. To begin, it’s essential to understand the sponsoring broker requirements mandated by California’s Department of Real Estate (DRE). These requirements ensure that your chosen broker is licensed and in good standing with regulatory authorities.

When choosing the right broker, consider factors such as their reputation, training programs, commission structure, and office culture. A reputable broker with comprehensive training programs can significantly enhance your skills and knowledge, setting you up for long-term success. Additionally, understanding their commission structure will help you gauge potential earnings and align them with your financial goals.

Starting your real estate career in California requires careful planning and informed decisions. By selecting a sponsoring broker who meets all regulatory requirements and aligns with your professional aspirations, you’ll be well-equipped to launch a successful career in this dynamic field.

Mistakes to Avoid When Starting Your Real Estate Career in California

Starting a real estate career in California can be both exciting and challenging. However, new agents often fall into common pitfalls that can hinder their success. Here are some key mistakes to avoid:

1. Lack of Market Knowledge: One of the most critical errors is not thoroughly understanding the local market. New agents should invest time in researching neighborhoods, property values, and market trends to provide accurate information to clients.

2. Poor Networking: Building a strong network is essential for any realtor. New agents should attend industry events, join local real estate groups, and connect with experienced professionals who can offer guidance and referrals.

3. Inadequate Financial Planning: Many new agents underestimate the financial investment required to start their career. From licensing fees to marketing expenses, it’s crucial to budget accordingly and have a financial cushion for the initial months.

4. Neglecting Continuing Education: The real estate industry is constantly evolving with new laws and technology. Beginners should prioritize ongoing education to stay updated with industry changes and enhance their skills.

5. Ignoring Marketing Strategies: Effective marketing is vital for attracting clients. New agents should utilize various marketing channels such as social media, email campaigns, and open houses to promote their services.

By avoiding these common pitfalls for new agents and following these tips for new realtors, beginners can lay a solid foundation for a successful career in the competitive California real estate industry.

The Benefits of Continuing Education and Professional Development

Continuing education and professional development are vital components for anyone looking to advance their career and stay competitive in today’s fast-paced job market. Engaging in ongoing learning opportunities allows professionals to enhance their skills, gain new knowledge, and maintain a high level of proficiency in their respective fields.

One of the primary benefits of continuing education is the ability to stay updated with industry trends. As industries evolve, new technologies emerge, and best practices shift, it becomes crucial for professionals to keep pace with these changes. By participating in professional development opportunities such as workshops, seminars, and online courses, individuals can ensure they remain knowledgeable about the latest advancements and methodologies relevant to their work.

Advanced certifications for agents are another significant advantage of continuing education. These certifications not only validate an individual’s expertise but also demonstrate a commitment to excellence and a dedication to maintaining high standards within the profession. Earning advanced certifications can open doors to new career opportunities, higher earning potential, and increased job security.

Moreover, continuing education fosters personal growth and satisfaction. The pursuit of knowledge can be incredibly fulfilling on a personal level, providing individuals with a sense of accomplishment and confidence in their abilities. This continuous improvement mindset ultimately leads to better performance at work and greater contributions to one’s organization.

In summary, embracing continuing education and professional development is essential for staying competitive in any industry. By taking advantage of these opportunities, professionals can remain current with industry trends, achieve advanced certifications that enhance their credentials, and experience personal growth that translates into career success.

Conclusion, Take The First Step Toward A Rewarding Career In Real Estate!

Embarking on a career in real estate can be both exciting and rewarding. Whether you are just starting out or considering a change in your professional path, the real estate industry offers numerous opportunities for growth and success. To begin, it’s essential to obtain the necessary education and licensing required in your region. This often involves completing pre-licensing courses, passing a state exam, and continuing education to stay current with industry trends and regulations.

Once licensed, gaining experience through internships or entry-level positions can provide valuable insights into the day-to-day operations of real estate transactions. Networking with established professionals and joining local real estate associations can also open doors to mentorships and job opportunities.

In addition to formal education and networking, developing key skills such as negotiation, communication, and market analysis will significantly enhance your ability to succeed in this field. Real estate is a dynamic industry that requires adaptability and a keen understanding of market conditions.

Taking the first step toward a career in real estate means committing to continuous learning and professional development. With dedication, perseverance, and the right resources at your disposal, you can build a fulfilling career helping clients find their dream homes or investment properties. You can start today by researching educational programs near you or online courses that fit your schedule.

read more
1 2 3 4 5
Page 4 of 5